Just had the inspection. I need to put in some additional GFI plugs in the kitchen.
We’re finaled and we can move in!
Just had the inspection. I need to put in some additional GFI plugs in the kitchen.
We’re finaled and we can move in!
I installed the last toilet last night (in the master bath) so our plumbing is now officially done.
I’ve also planned our deck and done a material take-off for it. Amber’s working on planning the shelves for the pantry so we’ll order all that material tomorrow and have it delivered on Friday. I expect to get the deck built this weekend and may have time for exterior lights as well.
I’ve decided to start a new feature here on this largely neglected blog. I’m going to try to post every day I work on the house with a brief description of what I’ve done – as a friend put it a little while ago, it’ll be a like a change log for the house. Matt was doing something like this for awhile, and I’ve decided to pick it up again and see how long I can manage to do it.
I do have one request though – could anyone out there reading this refrain from saying how close we are? I’ve been hearing this for months now I’ve gone from “oh yes, we’re getting close!” to “*sigh* yes, getting closer” to “*huge sigh* well, there’s still a lot of work” to “*gigantic sigh* I guess”. I may snap sometime soon, and the results may not be pretty. Yes, if perhaps my husband didn’t have to work 70+ hours a week and/or I wasn’t homeschooling and taking care of three children and all the household duties a family entails, we probably would be in by now. But that’s not the situation, and close is a relative term. So as to not turn this into a huge rant, I think I’ll just stop now. I think you all get the point. 🙂
Sort of along that vein, I’m also going to put together a list of everything that needs to be done for us to move in, so that you all can see what we’re up against. I’m not sure how best to do this – perhaps I’ll see if I can make a static page and strike through the completed items as we finish them. I’ll post something about it when I figure it out.
Running Water. In the house.
A couple weeks ago I started digging the trench to get water into the house. Yesterday, I finished digging and cut and glued up all the pipe. The digging job involved a couple hours work chipping away at the foundation so that I could run a pipe vertically right next to the house.
Today, we turned on the water and checked for leaks. Everything outside was good, but I had a very slow drip in the compression fitting in the valve for one of the toilets. We turned off the water to the house and drained the system then I cut the stub back a bit further and put the valve back on more tightly.
After the supply was all taken care of, I started work on our laundry sink. We’ve got a free-standing plastic tub sink that will be next to our washing machine. I got the faucet all assembled and mounted, the waste line all cut, taped and screwed and attached the supply lines (though only cold works as we don’t have a water heater yet).
At the end of the day, we could turn on a faucet and have running water in the house. Very exciting.
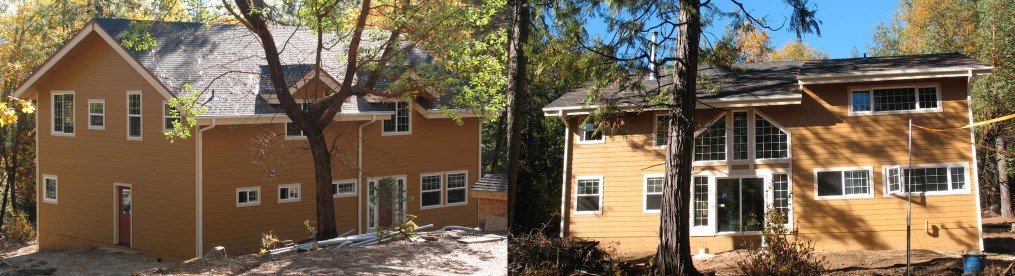
Since our previous image was a bit old and didn’t really reflect the current state of the house (picturesque as it was) I’ve updated the image to be more current.
This replaces the image referenced here.
The new image is a composite of two different views of the house taken at approximately 1:30 PM PST on November 15, 2008.
The image on the left is primarily the front (North) side of the house and the image on the right is the back (South) side of the house.
You can see in both that it’s been painted and gutters are installed. On the back side, you can see out woodstove chimney (left of the big cedar).
Today was the day – rough electrical, rough plumbing and rough framing.
There’s a few minor things that we need to fix but we’re all signed off.
The inspector was very impressed by the electrical panel (thanks, Chris).
All-in-all it was much simpler than I expected it to be. Now we’re on to drywall, then the finish work.
In the past it’s been my preference to blog about big items done on the house. Major things, accomplished in a set timeframe. However, those sorts of posts usually require a commensurate amount of time to blog about them and in the past few months it’s just felt like too much.
I’ve been thinking about this, the lack of communication and what to do about it, and I’ve decided to not sweat the big stuff. I’m going to blog after I work on the house.
It may be a sentence, it may be a paragraph, it may be a full blown post with pictures and everything. The important thing is to put the info out, in whatever form.
To start with, I’m just going to run down a list of little things that we’ve accomplished in the last few months that I haven’t been blogging.
In no particular order:
I just updated the mast image to better reflect the current state of the house – sided and roofed.
The new mast image was taken on 2/3/2008 at about 8:15 AM PST looking South.
As many of you know, we brought Joc (pronounced “joss”, short for Jocelyn) into our lives back in August.
Since that time she’s lived in the tent or the trailer with us. When we moved into town, she stayed on the property and for a while we were going up there mornings to let her out of the trailer and feed her and evenings to put her back in the trailer and feed her.
This worked, but it wasn’t really an optimal solution – especially when the heater stopped working due to a blown fuse.
I’d been meaning to build her a dog house for a while, but hadn’t really made time for it so I decided it was finally time.
I planned out a basic structure 48″ wide, 64″long with 30 1/2″ high walls 1 and a 5 in 12 pitch roof. The dimensions are all external and are designed to give me a good, clean 16″ on center layout for studs and sheeting. I had left over 2×6’s from the house framing so I built it with those. It gives inside dimensions of approximately 37″x55″ (which turned out to be a bigger space than I’d realized it would).I bought materials (wall and roof sheeting, insulation, extra lumber for ridge beam and fascia, and treated wood for the floor joists) and built the floor, walls and rafters in one day.
The floor is pressure treated 2×6’s with rim joists running the long way and joists on 16″ centers with 3/4 OSB on top.The long walls are tied to the short walls with overlapping top plates and I used 2 stud corners so that I could get insulation in and use less wood. I framed an 18″ wide by 24″ high opening and used a left over piece of 4×6 as a header.
There’s a 24″ overhang in front, over the opening, and an 8″ overhang in back. The other overhangs are pretty small – mainly just to keep the water from dripping down the walls which are sheeted with 3/8 OSB.The rafters are at a 5 in 12 pitch and butt up against a ridge beam The ridge beam is supported by a single 2×6 stud on each side to help keep the ridge from dropping and provide a nailing space for my gable sheeting. The ceiling is a cathedral style (following the underside of the roof – not flat) and the roof sheeting is 5/8 OSB.
Since it’s a pretty basic structure, I decided to build it with barge rafters, lookouts and a real fascia because it’s a technique I didn’t use on my workshop. All in all it worked well. I feel capable of doing it that way again on a bigger structure. I still find it pretty amazing how much I’ve learned about framing in the last 8 months or so.
It’s insulated with R-19 fiberglass insulation and we’ll get a vinyl door to help seal it.Right now, it’s just got tar paper on the roof for water proofing. Once the snow melts and the roof dries out I’ll be able to put shingles on. Since each side isn’t very big (only about 30″ by 96″) I was able to use full sheets and there’s only a small opening at the ridge.
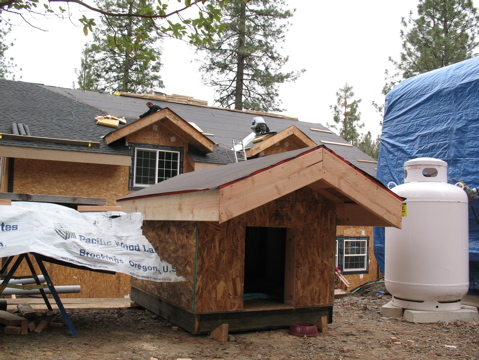 The front of the dog house with the “people house” in the background. The triangular wedges were leftover from construction and I used them to level the floor.
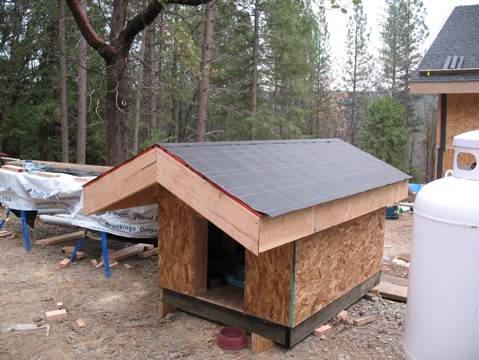 Another angle. The large overhang in front should help to keep the entry dry and provide somewhat of a shady spot in the summer.
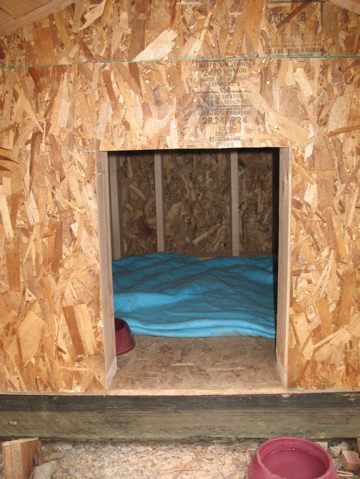 Looking inside – before I insulated.
[1] Since I’ve got a 24″ tall opening, a 3 1/2″ high header and a double top plate, building a 30 1/2″ wall means I don’t have to put any top cripples in above the header.
Well, all the hard work from the last couple months has payed off. We now have a poured slab and we’re ready to move on to the panels.
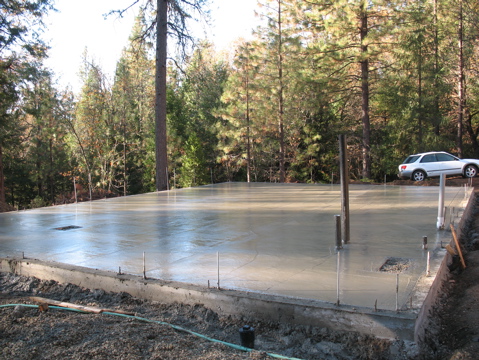
This picture is from shortly after the slab was poured so it’s still very wet looking.
We’ll put together a more detailed post with pictures from the flurry of work in the last couple weeks getting to this point, but I wanted to get the slab shot up there.
Our panels arrive on 11/7 and then our house will really start to take off.