Just had the inspection. I need to put in some additional GFI plugs in the kitchen.
We’re finaled and we can move in!
Just had the inspection. I need to put in some additional GFI plugs in the kitchen.
We’re finaled and we can move in!
The last 2 foot stretch of railing is complete upstairs. On Saturday I laid the oak flooring we needed (yes, it does take pretty much all day to lay about 16 square feet of recycled 2-1/4 oak flooring) and today I got the railing up then started work on finishing the kitchen light install and our temporary deck railing infill (it’ll make more sense with a picture).
While I was working on the floor on Saturday, Amber finished the laminate flooring in the boy’s room (yes, she laid half about 40 square feet in less time than it took me to do 16). Amber’s also been working on bundling some of our leftover oak flooring so that we can get the master cleaned and get laminate flooring down there.
The move-in list has been updated and it really does look like we’re getting close!
I installed the last toilet last night (in the master bath) so our plumbing is now officially done.
I’ve also planned our deck and done a material take-off for it. Amber’s working on planning the shelves for the pantry so we’ll order all that material tomorrow and have it delivered on Friday. I expect to get the deck built this weekend and may have time for exterior lights as well.
My goal for the 4th of July weekend was to get a working kitchen in the house. I started on Friday morning with backsplash material partly cut, counters still in full-size boards, range and dishwasher just occupying space (but out of boxes) and sink, faucet, garbage disposal and range hood still in boxes.
I’m happy to say that we now have a working kitchen.
 A direct shot of the cabinet under our sink. I was trying to keep everything as clean as possible and keep space for storage. To that end, all of the hoses are run in the back and the waste line is very compact – though only having a single bowl sink helps with that. Since we have a pullout faucet and four water valves, I pegged the faucet supply line up on the left to prevent the pullout from getting hung up on anything.
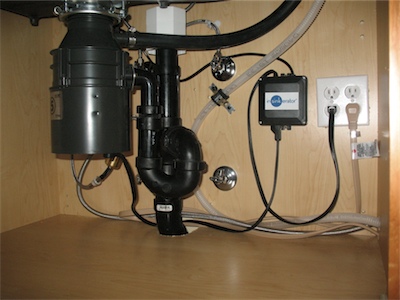 This shot is from further to the right – just another perspective on it. The white box near the top of the picture is our STUDOR® vent. For those of you unfamiliar with it, the black box near the plugs is the controller for our air switch. The dishwasher waste line is pegged to the back wall to keep it stable and prevent it from resting/rubbing on the air switch controller. I used some leftover 7/8″ hose as a buffer between the waste line and the plumbers tape.
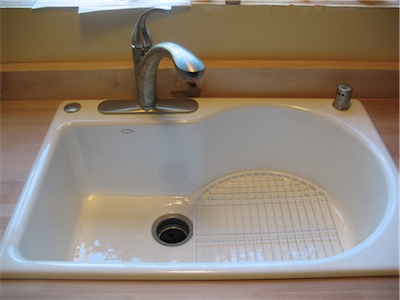 Our sink from above with all the bits and bobs installed. I’m not really happy with the air gap (on the right). It’s got a threaded plastic body and plastic nuts and they keep slipping the thread whenever I jiggle the hoses. I’m going to see if there’s a metal one avail and switch it out. Since our countertops are maple butcher block, I bought some maple planks to fashion the backsplash – that’s what you see here. The counter tops are 25″ deep and the cabinets with drawer/door faces are also 25″ deep. It didn’t look very nice to have the countertops and doors/drawers in the same plane so one of the reasons for going with such a thick backsplash was to push everything out. The backsplash is 1 3/4″ thick and we cut a 1/2″ thick, 3/4″ tall rabbet out of them. This gives us an extra 1 1/4″ of countertop past the cabinets and gives us a lip to hide any inconsistency where the backsplash meets the counter.
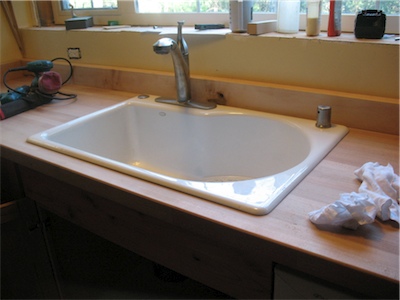 The sink again, from the side so you can see more of the countertop (and a few of my tools).
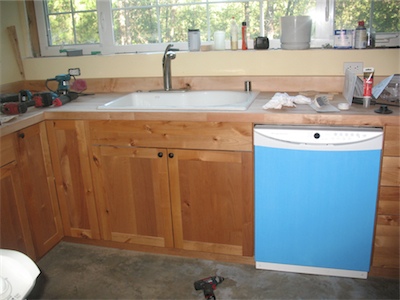 The dishwasher is installed and working. I tested it briefly by starting the cycle and then canceling. Beyond making sure it worked, I also needed to ensure that there were no leaks. No, it’s not really blue – that’s just the protective cover.
We’ll post some pictures of the range, vent hood and overall kitchen some time in the next week.
I updated the
Move-In Checklist to reflect these changes.
Running Water. In the house.
A couple weeks ago I started digging the trench to get water into the house. Yesterday, I finished digging and cut and glued up all the pipe. The digging job involved a couple hours work chipping away at the foundation so that I could run a pipe vertically right next to the house.
Today, we turned on the water and checked for leaks. Everything outside was good, but I had a very slow drip in the compression fitting in the valve for one of the toilets. We turned off the water to the house and drained the system then I cut the stub back a bit further and put the valve back on more tightly.
After the supply was all taken care of, I started work on our laundry sink. We’ve got a free-standing plastic tub sink that will be next to our washing machine. I got the faucet all assembled and mounted, the waste line all cut, taped and screwed and attached the supply lines (though only cold works as we don’t have a water heater yet).
At the end of the day, we could turn on a faucet and have running water in the house. Very exciting.
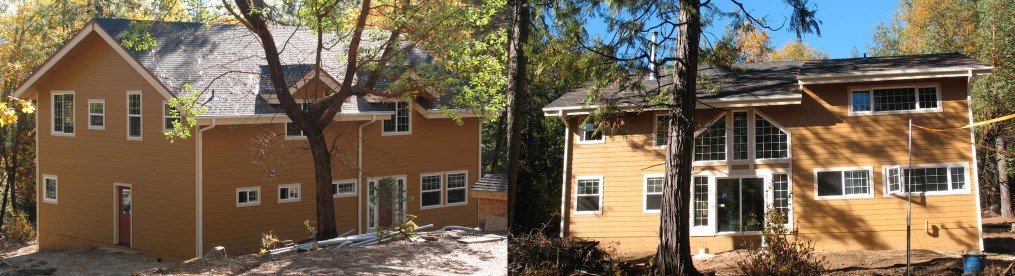
Since our previous image was a bit old and didn’t really reflect the current state of the house (picturesque as it was) I’ve updated the image to be more current.
This replaces the image referenced here.
The new image is a composite of two different views of the house taken at approximately 1:30 PM PST on November 15, 2008.
The image on the left is primarily the front (North) side of the house and the image on the right is the back (South) side of the house.
You can see in both that it’s been painted and gutters are installed. On the back side, you can see out woodstove chimney (left of the big cedar).
Last year our well went un-insulated all winter and during a particularly cold stretch we had a pipe break. Fortunately I noticed it within about 12 hours because I saw that the electrical meter was spinning at a crazy rate. For the last 10 or 11 months I’ve meant to do something to prevent it from happening again this winter, but the house has always taken priority
Since we’re currently having drywall hung and textured, I can’t really work on the house so I decided to finally do something about the pump house. The fact that we’re expecting temperatures to be in the high teens had something to do with it too.
I figured it would take me a few weekends to really get a good pump house up and didn’t really want to spend that much time on it right now (much less the cost of building materials) so I “made do”.
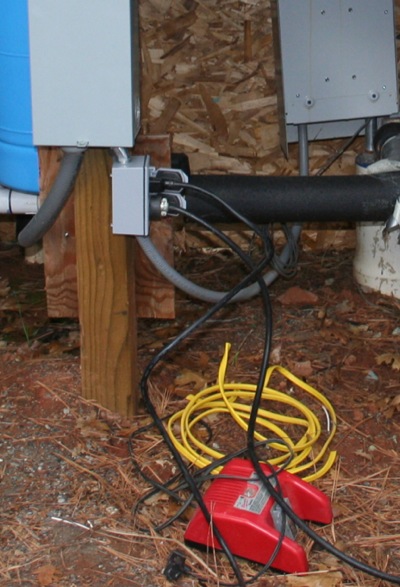 Before I could work on anything up there, I needed power. When we ran the wires for the well back in the summer of 2007, we ran four so that we could have two hot legs for the 220V pump, a ground and a neutral for a 110 circuit. I used one hot leg and the 110 to put in a duplex plug.
 The basic frame is made up of three pallets that my Dad had. I bought three 4×8 sheets of 3/8 OSB for about $9 each and cut and stapled them up with my pneumatic stapler. It ends up being a surprisingly stable structure.
 The backside of the pump house. I’ve since gone back and cleaned up the gaps some by stapling additional OSB over them and using leftover mastic from our SIP installation to “caulk” them.
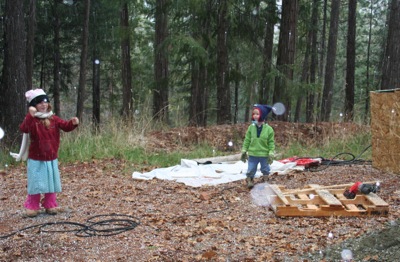 The kids hung out and helped. Here they’re playing in the “snow”. I had Emma help me a as a counterweight when cutting the OSB. I put the sheet in the back of my truck hanging out over the tail gate and Emma sat on the end in the truck so that it would remain horizontal for me to cut.
I cut a final sheet and used screws to hold it in place over the 4th wall. Now I’ll be able to access the internals by simply taking a couple screws out. This will give me the access I need to turn the light on and off to be doubly sure nothing will freeze.
Today was the day – rough electrical, rough plumbing and rough framing.
There’s a few minor things that we need to fix but we’re all signed off.
The inspector was very impressed by the electrical panel (thanks, Chris).
All-in-all it was much simpler than I expected it to be. Now we’re on to drywall, then the finish work.
One more receptacle box. A bit of wire cleanup. Rough electrical will be done! (assuming I don’t find anything else while cleaning up and reviewing it all).
Need to fix a stud and redo some vent piping to make the stud more vertical. Need to install vents for dryer and water heater.
I’m very close on finishing everything I need for the rough inspection. I’ve got an appointment with a guy next Saturday to talk about drywall and get a bid.
Recently completed: