We’ve moved most of our stuff to storage, I’m working on getting my office setup and we’ve got a basic camp setup on the property. We’ll be improving it as we go and pictures will likely follow next week but I just wanted to let everyone know that we’re here and it’s going well.
Month: July 2007
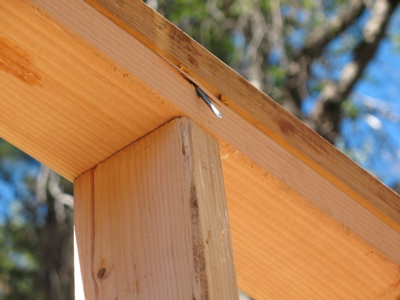
Workshop Rafters
I’ve spent the last two weekends working on my workshop. The focus has largely been the roof rafters, but I did put up some wall sheathing to help keep the structure stable.
After having worked on the rafters, I’m very glad that our house will not have standard rafters with a bird’s mouth. I spent several hours looking at how my workshop book described the rafters and how to build them, trying to figure out the dimensions they provided and how I was supposed to cut them. This wasn’t all on-site, some time was before I got there.
I drew pictures. I dredged up my geometry lessons. I recalled, sine, cosine, and tangent to calculate angles. I relied on Pythagoras. I added angles to 180.
It all just didn’t seem to come out right on paper. The most confident number I arrived at seemed to indicate that I’d only have about 1/4 inch of my rafter bearing on my wall, and the rest of the bird’s mouth would be hanging out in space.
I figured maybe I was missing something in 2d that would become apparent in 3d and just took my best shot at cutting the rafters.
I cut them. I stood them up with a spare 2×6 to simulate the ridge board. It wasn’t right. My calculations on paper were correct and the rafter was only bearing on my wall by about a 1/4 inch on each side.
I looked back over my notes and calculations and scratched my head.
Then, I called my Uncle who lives in the area and went over to their house to see if they could help me figure out what was going wrong and how to fix it.
He took my diagram/dimensions and re-drew the rafter in his CAD software (literally, his CAD software as he helped write it). We discovered that the dimension that the book provided for the distance from the ridge board to the top of the bird’s mouth, was really the distance to the bottom of the bird’s mouth.
Fortified with proper dimensions, I returned to my campsite (since it was dark) and went to sleep.
The next day, I used my new measurements to cut another pair of rafters. With high hopes, I fitted them together…
Huh? Too far apart? My first pair were to close together (bird’s mouths were too far down the rafter). This pair was too far apart (bird’s mouths were not far enough down the rafter). What’s going on here?! Then I realized, the distance I had from my Uncle for the top of the bird’s mouth was after I’d mitered the rafter to butt against the ridge board – but I just measured that distance before I did any mitering, so I need to add 2 3/4 inches (the length of the short leg of the triangle I needed to miter off). Argh.
On my third try, I got the rafters cut correctly.
This was the weekend of 7/7, 7/8 and I didn’t do much more on the workshop other than make cradles for my ridge board and start to get them set.
Last weekend (7/14, 7/15) I was able to work more effectively on the rafters since I had correct dimensions.
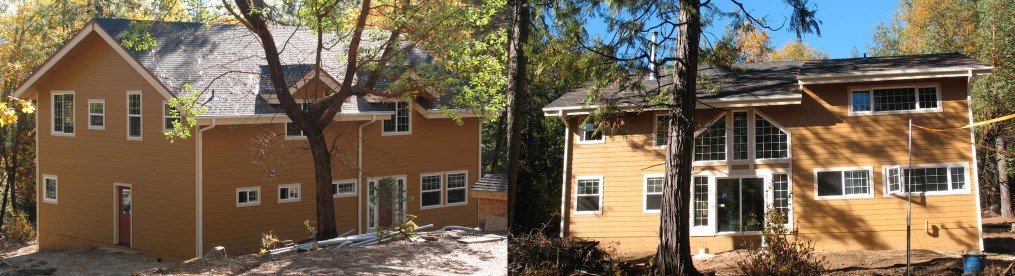
A Big Improvement
Look what we had delivered on Wednesday!
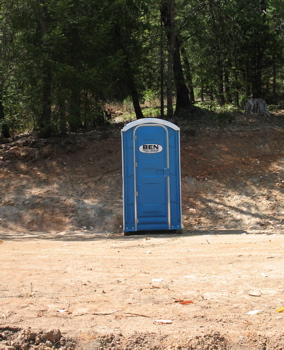
You don’t think this looks so great? Well, here’s the alternative…
Well Pics
I took some shots of our well when I was up there last weekend. It sure looks like a nice little package and I’m looking forward to running it.
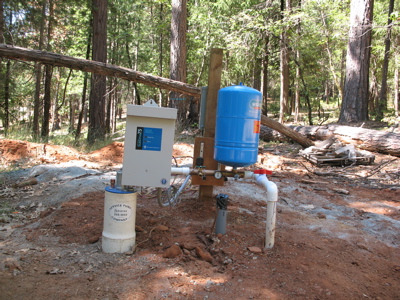
This is the “front” of the well. The motor/pump controller is on the left, the tank is the blue bit on the right and our electical box is on the other side of the post. The big white tube is the well itself and the little white pipe is our water supply line to the house. The small grey pipe is where the electrical will come out.
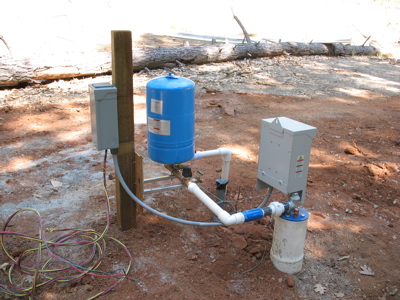
A side view – you can see the electrical box on the post now. The entire system is actually supported by some metal brackets hung off the post. Before we start getting weather this fall/winter, I’ll build a small structure around everything here to protect it.
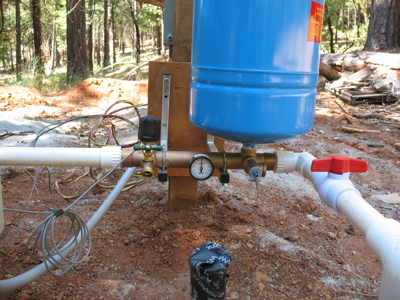
A closer view of some of the component bits. The black “knob” above the spigot is the pressure sensor. The gauge in the middle indicates the pressure and the red bit on the right is the ball valve (currently closed) which prevents the water from going into our supply line (which is wide open and would make quite a mess).
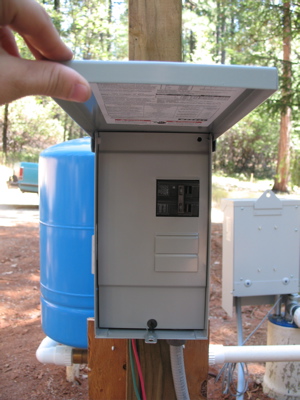
Instead of the usual cut off switch, I had the pump company install a small electrical box. This way, I have space for my breakers for the light and courtesy plug I’ll be installing in the future. The light will be hooked up to a thermostat and we’ll use it to keep the pump house from freezing during the winter.
Jailbreak Mailbox
It was a simple task.
Install a new mailbox at our property so that we could start receiving mail after we move up there.
I borrowed a post hole digger and a pick.
I measured the height of the other mailboxes there and decided that 39″ above ground and 18″ below ground would give me a nice base and put the mailbox at the proper height.
I measured and cut the treated 4×4.
I began to dig with the post hole digger.
The ground was hard so I broke it up a bit with the pick.
I continued to dig with the post hole digger and hit a few rocks.
I used the pick to get them out.
Post hole digger – more rocks.
More rocks.
More rocks.
Larger rocks.
I can’t work the pick in a hole that’s only 8 inches across as I go deeper.
I look over the meager tools at hand – mostly carpentry and a few electrical.
Hmm…a screwdriver…and a hammer…
In the end, I dug most of the whole with a screwdriver and my hands.
I scratched around with the screwdriver until I’d broken up the dirt, then pulled it out by the handful.
I scratched around rocks like an archaeologist trying to get enough free to pull them out.
I occasionally used some well-placed pick blows to break loose extremely recalcitrant stones.
It took me 90 minutes to dig an 18″ hole.
But, here’s the end result:
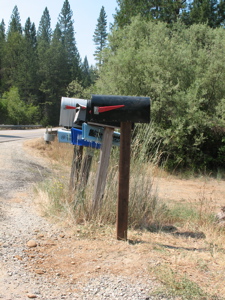
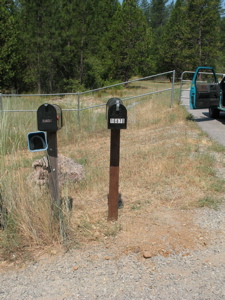
I wonder what it costs to rent an auger…
Oh Well!
When we bought the property, there was already a well on it which saved us the cost and trouble of having one dug – especially because the well is 480 feet deep. About a week and a half ago, we had someone install a pump and pressure tank for the well. It’s a pretty neat system because there’s a controller at the tank that takes single phase power and converts it to three phase power. This three phase power is then run down the well to the pump motor. Since it’s three phase, you can use a smaller wire and it saves you some money in the installation.
Another cool thing is the pump itself. It’s a variable speed pump. When we need more water to keep the pressure up, the controller just speeds up the pump. It’s supposed to be a more economical implementation in terms of power used and easier on the pump. In addition to that, you need a much smaller tank too. Since the tank is only there to provide a little buffer for the motor, it’s only 11″ in diameter and 22″ tall. Unfortunately, I didn’t get a picture of the setup but it’s a nice little package.
We’re going to run wires up to the pump some time in the next month and build small structure around it for protection and to help keep it from freezing. The wires will let us plug in a generator down at the house site. I had planned to hook the generator up to the well at the well head and test it out, but none of the hardware stores in town carried the twist-lock plug I needed so I’ll have to do that next time I’m up.
Putting up walls
I was up again over the weekend, continuing construction on my workshop. This installment was walls.
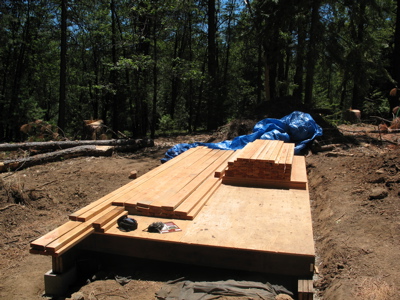
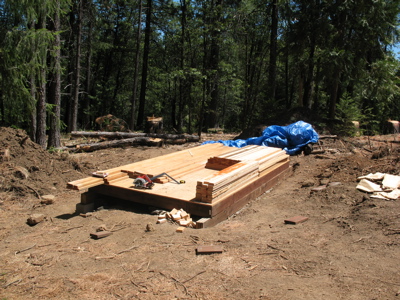
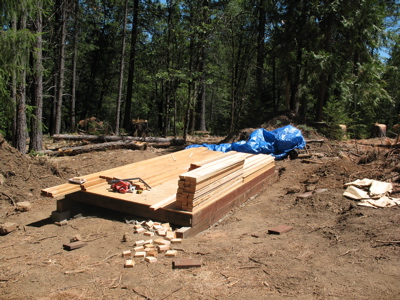
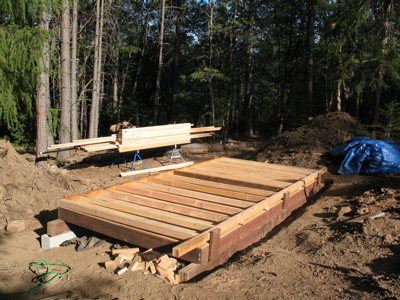
This is the lumber that’s left from my drop after I got the floor built. I stacked it on the deck and covered it with a tarp before I left last time.
I calculated that I needed 47 studs for my four walls. When I got finished, I had used 44 of them due to some estimation of how my door and window arrangement would go.
The pile grows – I’m very glad that I won’t be stick framing our house.
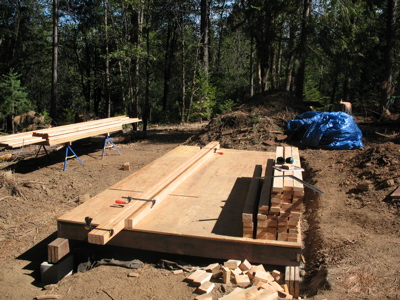
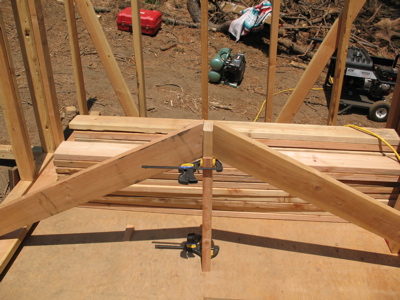
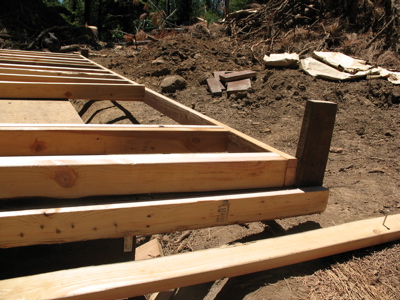
After I got all my studs (and my plates) cut to length, I marked the plates for the long walls. My bottom plates are 16′ (the length of the shed) and my top plates are 19′ (so that the roof overhangs the shed). I marked plates for both walls at the same time because it seemed easier and I had the space for it. I used clamps to hold the lumber together while I worked.
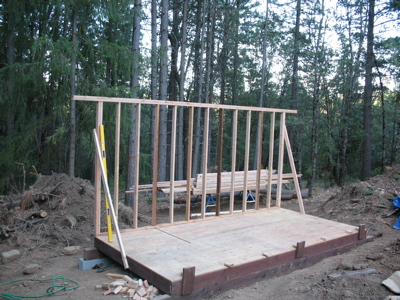
My first wall is framed and awaiting help to stand it up! It took longer than I expected to put it together (I sense a recurring theme here) and I had to figure out how to hold the wall in place while I nailed it. I ended up nailing blocks to both sides of my deck, sticking up above the deck. They provided the resistance necessary for the nails to enter the wood and not just push the wood away.
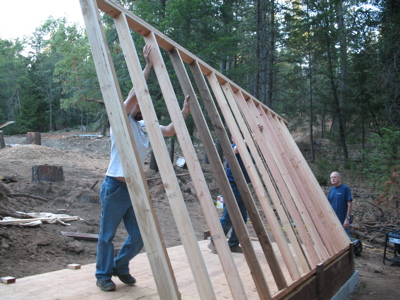
My cousin Jonathan (in the white shirt, helping me push the wall up), Uncle John (standing ready with the level), Jonathan’s fiance (11 days and it’ll be wife!) Jenn (taking pictures) and my Aunt Sandy (watching from a seat by the car) came to help me put up the wall.
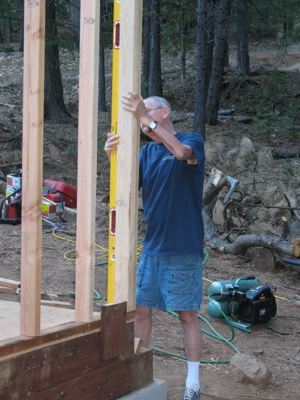
Once we had the wall up, Uncle John made sure it was plumb before we nailed in braces.
I had the braces (8′ long 2x4s) prepped with a nail just through on each side so we could just hold them against the wall and nail it down.
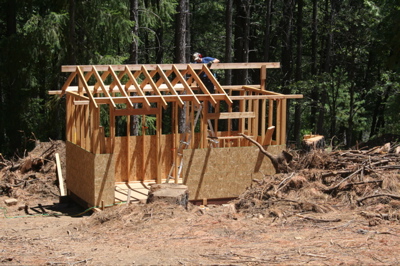
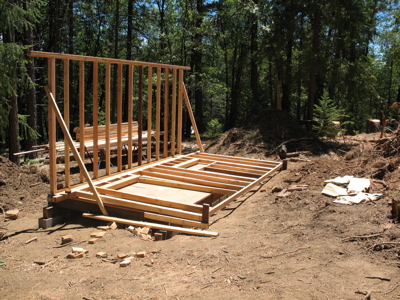
The first wall is up! You can see the braces I nailed in (scrap joist material) as well as some little blocks of 2×4 scattered along the edge. Before the crew arrived, I used my pry bar to lever up the wall and slip some blocks underneath it so that it would be easier to lift.

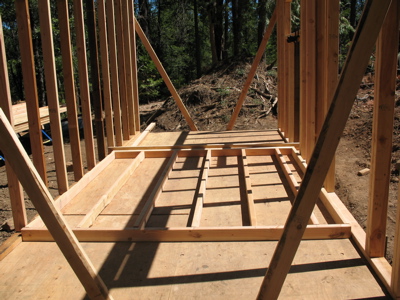
Trimmers, cripples, headers, rough sill, jack studs and king studs all go into making a wall with a door and a window – in addition to the usual studs and plates. Everything is cut to length and ready to be assembled.
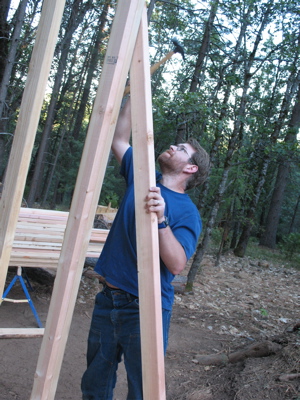
Here it is, assembled and ready to be raised. If you’ll look closely, I had to build it with the top plate inside the triangle formed by the wall that’s already up, it’s braces and the floor. There was no reasonable way to put this wall together on the deck without that. To raise it, we just took the braces off the back wall, made sure it wouldn’t fall down (the bottom plate was nailed down so that helped) then put the braces back up after the front wall was up.
Since I had to hang the front wall off the deck in order to have enough room to assemble it, I built some braces that I could nail against. That’s the part you can see. What you can’t see in the picture is that I also nailed a length of 2×4 to the other side of the “arm” to act as a “rail” for the wall to slide along as we lifted it up into place. This prevented it from dropping to the ground when we lifted and it worked quite well.

The front wall is up! We didn’t have any pictures taken during this process because it was more complicated (even with the help of my cousin Christopher) and everyone was focused on making sure that walls didn’t fall, braces were out of the way, walls were steadied, plumbed and re-braced. As you can see, I’ll have a large door on the left and a short, long window on the right. Figuring out how big those opening should be took some doing. I’m happy to say that the window fits admirably and I’m hoping that I left the correct amount of space for the door when it gets here in August.
One of my end walls nailed together and ready to be raised.
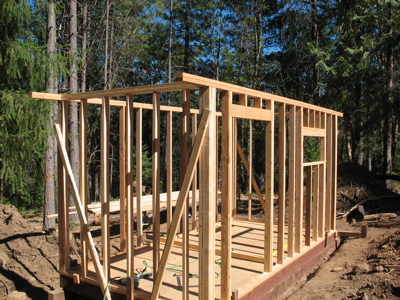
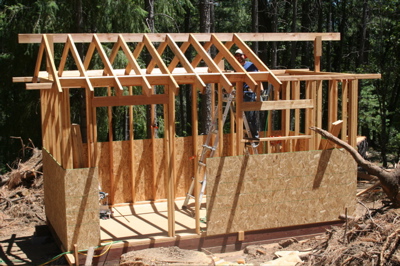
All of my walls are now up! I was able to raise the short ones by myself and just clamp them to the long walls while I got them plumb.
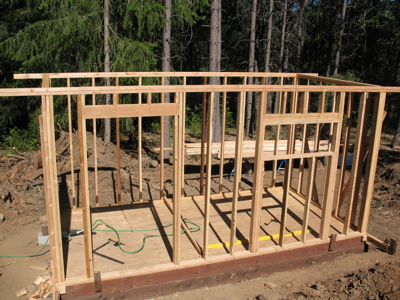
Another shot, from the front of the workshop and standing up on a stump to get a better shot.
What did I learn? Keep an eye on the angle that you’re holding the nail gun at when you nail your top plate on. It sucks to nail your wall to the floor and have to use a pry bar to get it up. I’ll have to deal with this (and a few more like it) when I’ve got a ladder up there and am working on the roof rafters.