Kitchen Wall

Since our house is a SIP house, it’s some extra work to put plugs and switches in the exterior walls. There will be times when it’s unavoidable, but we’re trying to minimize the situation both because it will be easier and we don’t want to pierce the envelop of the walls if we can avoid it.

One area in particular where we have to deal with this is in the kitchen. Kitchen’s require more plugs than any other room and it’s just plain convenient to have lots of plugs there. In order to make our electrical job easier, we’re furring out a 2×4 wall just inside the SIP wall. This will also give us a place to run some water and gas supply lines into the kitchen.

This is what I worked on yesterday. [1]

IMG_1953.jpg
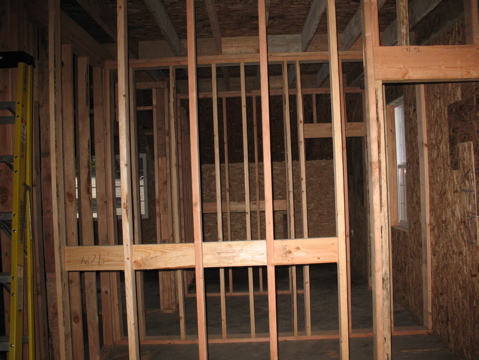
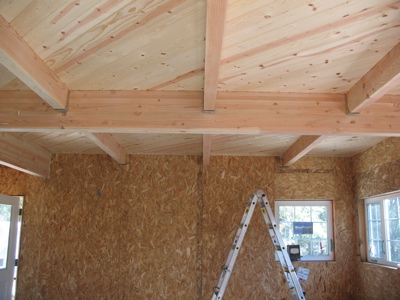
This is the “before” shot. Notice that the wall in the shot (the east wall) is entirely OSB and the flooring in the back of the shot meets the OSB at the top of the wall.

IMG_1964.jpg
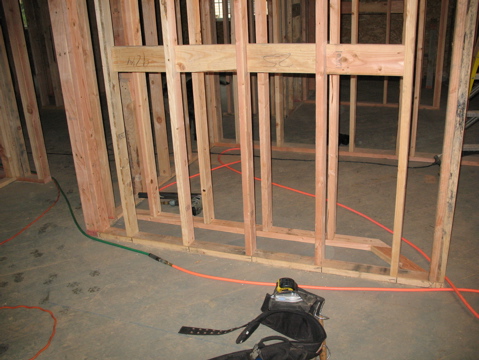
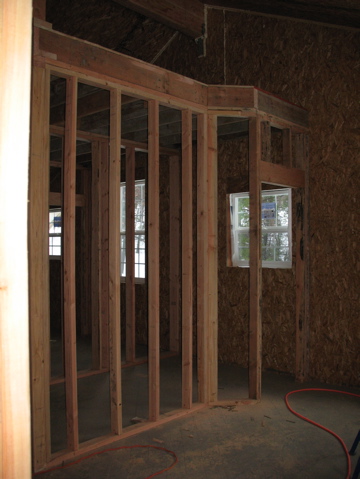
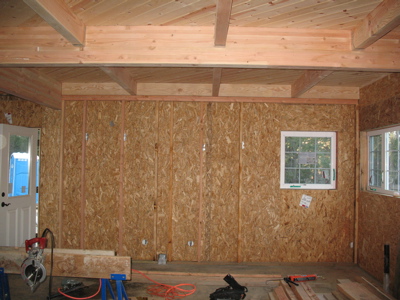
Here is the “after” shot. It’s not done as I still need to frame around the window and finish building the corner but it’s looking good.

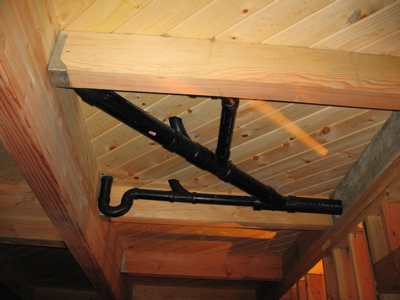
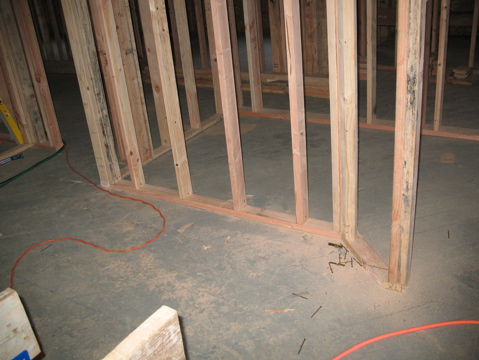
The studs are kind of hard to see, but they’re there. I put them on 24″ centers and we’ll just put a plug on each stud to get our spacing pattern. It’s 2 different sections of bottom plate – they break around the conduit embedded in the slab to feed water and electrical to a possible future island.

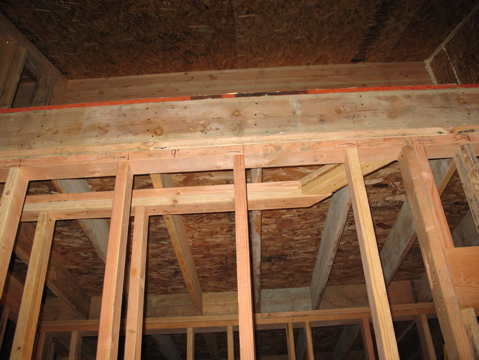
If you look at the top, you can see that the flooring no longer (visibly) meets the OSB. We had some leftover appearance grade 4×8 lumber when we built the house (determining lumber quantity must get easier with experience) so we decided to use it to make that wall more interesting after seeing an example in a picture of another house. It’s installed about 1 1/2″ off of the SIP wall which will give us about an inch of reveal past the drywall.

I was working by myself and had some pretty tight clearances so I didn’t want to have to stand the wall after building it on the floor so I built it in place. First I cut and nailed up the 4×8’s to keep them in place. Then I cut and nailed my upper top plate. The upper top plate is nailed to the SIP wall (which has a 6×6 post in it) on the right and to the glu-lam beam on the left. It’s nailed up to each 4×8 joist running perpendicular to the wall and to each decorative 4×8 chunk parallel to the wall. This ties everything together solidly and nothing has any space to move. Originally I’d planned to use right angle brackets to hold the decorative 4×8 chunks in place but I found it almost impossible to get them nailed in (you ever tried holding a nail and swinging a hammer a few inches up inside of a 1 1/2″ wide space?).

Once I had the upper top plate up, I cut the lower top plate and the bottom plates (bottom plates are pressure treated) and marked them for stud locations. I then nailed the lower top place up and just placed the bottom plate where it’s supposed to go. Once I had that to work from I began measuring and cutting studs to go between them. I found there to be about a 3/16″ variance in stud length, probably due to some unevenness in the concrete finishing around the embedded conduit.

After I had about 9 studs cut (enough to get even pressure from top plate onto bottom plate) I glued the bottom plates down with subfloor glue and began nailing the studs in place. After the studs were nailed up, I then nailed right angle brackets onto the studs and then into the SIP wall to help hold the wall in place. Probably this was overkill, but it makes me feel better and I’m sure that the inspector will appreciate it.

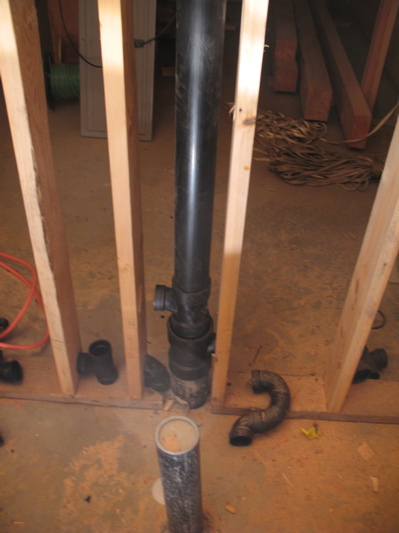
This weekend, I plan to finish the wall in addition to more work on waste line plumbing and starting on supply line plumbing.

[1] I know it was a workday – I went out to the property in the morning to meet with someone about some plumbing questions and to borrow PEX tools. It was an absolutely beautiful day and I decided to call my boss and see if I could take an unplanned day off to work on the house. He was very accommodating.

DWV Plumbing

We’re well on our way on the next phase of house building – Drain, Waste, Vent plumbing. The last month or so, I’ve been doing a lot of thinking and planning and the last couple of weeks have been busy executing, modifying and adapting the plan.I’m happy to say that I’ve now finished all 3″ waste lines. This means that the main waste stack is finished, toilet lines are in and all underfloor plumbing for the second story meets up with the main waste stack. I started out with about 5 feet of 3″ ABS pipe left over from slab plumbing and bought another 20 foot length when I started interior work. I now have only a 3 inch and a 2 3/4 inch piece of 3″ pipe left. Unfortunately, I also have a handful of 3″ fittings left over from various plan modifications but I figure that that’s just the way things are.I’m doing all my plumbing in 2″ and 3″ lines so that we don’t have any issues with clogs. We’ve had issues with previous places and I’m doing everything I can to avoid it here – one of which is to keep things big.Here’s the current state of things.IMG_1935.jpgThis is what I completed last weekend, but never got around to blogging about. The p-trap in the back left is for the master shower, the combo along that same line to the right is the vent for that line. The pipe that disappears into the left front corner behind the beam is for the master toilet. The combo in that line is its vent. The wye fitting which sends a pipe off at 45° from the toilet line is to bring in the sink drain from the master sink.IMG_1938.jpgThe same pipes, but from a different angle. Now you can see the line for the master toilet (back left) and the sink drain (just in front of it). We’ll have to soffit this space to hide the plumbing. It’s unfortunate to hide the beams and floor but we’ll gain a raceway for electrical lines. I knew from early on that we’d have to soffit here and I considered if it was worth using TJI’s 2 ft on center rather than the 4×8 joists on a 4 ft center. Given how the plumbing worked out, I’m glad I stayed with the 4×8’s because it gave me a much bigger box to work within and I didn’t need to worry about cutting through joists in this space. If you look closely, you can see my chalk and pencil lines on the underside of the floor. These helped me keep my pipes lined up and at the correct angles.IMG_1948.jpgThe single 3″ pipe that leaves the bay in the previous photo goes through some blocking that keeps our joists from rolling and enters a bay over the downstairs bathroom. The wye in the middle of the picture is where we pick up the drain from the sinks in the kid’s bathroom. We make a 90° turn and enter the main waste stack towards the back of the picture. The other horizontal 3″ pipe in the picture runs out to the right to the toilet in the kid’s bathroom. The master bathroom waste line joins the main stack with a 3″ san-tee with a 3″-2″ bushing so I can continue the vent straight up.IMG_1947.jpgHere’s another shot of that juncture where it’s more clear what’s going on. The master bath waste line is coming in from the left. I’ve got a 3″ san-tee going into a 3″ combo which runs up to a 90° elbow to send the waste line to the toilet in the kid’s bathroom. The other side of the 3″ combo has a 3″-2″ bushing in it and I’ll pick up the drain from the kid’s bath there.IMG_1946.jpgThis is the kid’s toilet connection. I’m using a 332 wye with a 45° fitting to run the vent back and behind the toilet. I built a 6″ plumbing wall there that we will put the vent in before running it out the roof.IMG_1950.jpgHere’s the base of the main waste stack. There’s a 4″ pipe coming out of the slab. I’ve got a 442 san-tee going right for the washer drain. Inside that is a 4″-3″ bushing so that I can switch to 3″ pipe for my main stack. Then I’ve got a 332 san-tee going left for the bathroom and laundry sinks. I may have to run those drains as 1 1/2″ instead of 2″ so that I end up with my drains at the right elevation. I’ll measure fitting sizes and see what fits. In the foreground is our drain line for the downstairs toilet (still sticking up where we had it when we poured concrete) and the little 90° elbow between the 4″ pipe and the stud on the left is the vent for the toilet. Originally, I was going to run that vent straight up in the same stud bay as the wast stack, but there wouldn’t have been any room to get it past the 332 san-tee for the bathroom and laundry sinks. Moving it over to run up this other bay gives me the space I need to let the pipes pass each other.I still need to put together the washer drain line and the downstairs sink lines, the downstairs shower drain and vent which I didn’t take pictures of, plus a bunch of vent stuff upstairs and the kid’s bath. All-in-all it’s going well. It’s definitely more difficult than I imagined it would be, but I feel like I have the tools now to really do the work. Some of those tools are pretty much what you’d expect but I was surprised at the need for others. I’ll write a follow up post talking about tools.

Moving a Wall

We’ve been spending a bit of time walking around the house, looking at the bare, framed walls and imagining how out stuff will fit into it. Thinking about how we’ll be using the space. Considering if it’s all “right”.

We have come to the realization that the master isn’t quite right for our bed. Amber and I bought a really nice (for us) oak, platform-style bed with attached nightstands and built in storage where the header usually is back when we moved into our first house in Felton (before Emma was born). The smallest square that will box the bed is about 8′ on a side. Our master bedroom is about 10′ deep (from the exterior wall to the bathroom wall).

This leaves us only about 2′ to walk around the bed and we just didn’t feel like it would be enough room.

After thinking about it individually, we each came to the decision that it really made sense to move the wall and make more space – and it’ll never be easier to move the wall than it is right now. It was a bit of a pleasant surprise for each of us to raise what we expected to be somewhat of a discussion point only to find out that we shared the view.

My dad and I started moving the wall about 1.5 weeks ago and it’s almost totally done now.

IMG_1752.jpgThis is the best “before” shot I can find. It shows the wall between the master and the master bath.

IMG_1836.jpgThe “close” wall is the original one and the far one is the new one. We kept the door where it was and just jogged the wall back 1′ on a 45° angle to make the math and cuts easier.

IMG_1840.jpgLooking up at the top plates. Since we have storage space on top of the bathroom, we’ll have to cut joists and the OSB flooring to match our new wall path.

IMG_1865.jpgHere is the almost finished wall. You can see that the new one is built, rim joist is moved, OSB is fixed and the old wall has been ripped down. In this shot the corner near the door isn’t totally finished, but I’ve finished it since I took the picture.

IMG_1866.jpgAnother perspective – looking down at it.

All in all, it wasn’t a very difficult task. Pretty much just straightforward carpentry. We had to think a bit to make sure we cut things right and we removed OSB in such a way that we could trim the joists, cut the OSB down and re-attach it.

We drew an outline of the bed on the floor using a lumber crayon while we were trying to decide if we had enough space and walking around the “bed” is now much more comfortable. I think that we made a good decision and will be very happy with the results.

Brief Status Update

I feel like the month of January was mostly a time for catching our breath and figuring out what’s next.

The structure is totally up (walls and roof). Most internal framing is done. The roof material is on and most of the siding, trim and fascia are done. External doors are hung, windows are in and we’re totally dried in.

Next comes plumbing and electrical. We’ve been planning our electrical setup and the DWV lines that we’ll need to run and the implementation of these plans should start in earnest this month.