My goal for the 4th of July weekend was to get a working kitchen in the house. I started on Friday morning with backsplash material partly cut, counters still in full-size boards, range and dishwasher just occupying space (but out of boxes) and sink, faucet, garbage disposal and range hood still in boxes.
I’m happy to say that we now have a working kitchen.
 A direct shot of the cabinet under our sink. I was trying to keep everything as clean as possible and keep space for storage. To that end, all of the hoses are run in the back and the waste line is very compact – though only having a single bowl sink helps with that. Since we have a pullout faucet and four water valves, I pegged the faucet supply line up on the left to prevent the pullout from getting hung up on anything.
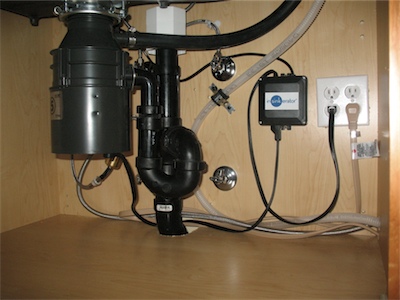 This shot is from further to the right – just another perspective on it. The white box near the top of the picture is our STUDOR® vent. For those of you unfamiliar with it, the black box near the plugs is the controller for our air switch. The dishwasher waste line is pegged to the back wall to keep it stable and prevent it from resting/rubbing on the air switch controller. I used some leftover 7/8″ hose as a buffer between the waste line and the plumbers tape.
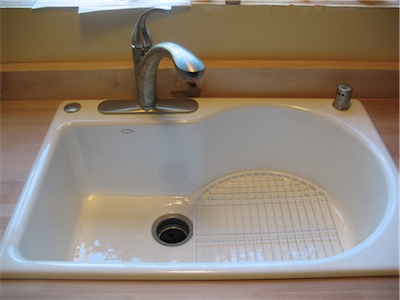 Our sink from above with all the bits and bobs installed. I’m not really happy with the air gap (on the right). It’s got a threaded plastic body and plastic nuts and they keep slipping the thread whenever I jiggle the hoses. I’m going to see if there’s a metal one avail and switch it out. Since our countertops are maple butcher block, I bought some maple planks to fashion the backsplash – that’s what you see here. The counter tops are 25″ deep and the cabinets with drawer/door faces are also 25″ deep. It didn’t look very nice to have the countertops and doors/drawers in the same plane so one of the reasons for going with such a thick backsplash was to push everything out. The backsplash is 1 3/4″ thick and we cut a 1/2″ thick, 3/4″ tall rabbet out of them. This gives us an extra 1 1/4″ of countertop past the cabinets and gives us a lip to hide any inconsistency where the backsplash meets the counter.
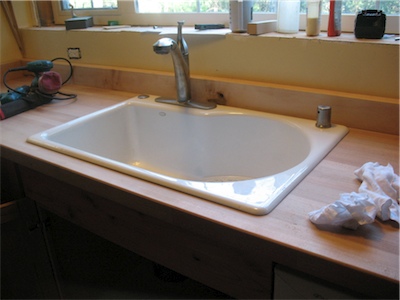 The sink again, from the side so you can see more of the countertop (and a few of my tools).
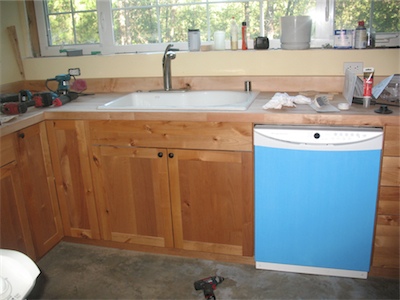 The dishwasher is installed and working. I tested it briefly by starting the cycle and then canceling. Beyond making sure it worked, I also needed to ensure that there were no leaks. No, it’s not really blue – that’s just the protective cover.
We’ll post some pictures of the range, vent hood and overall kitchen some time in the next week.
I updated the
Move-In Checklist to reflect these changes.
sweet man! Things are looking really good! Now I for some reason thought you weren’t supposed to have a disposal if you are on a septic system, or am I just crazy?
Matt and Amber, it’s fun to see a replica of our sink in your kitchen… I wish ours had come with the “grate” to protect the sink bottom. Great looking countertop and cabinets.