Moving a Wall

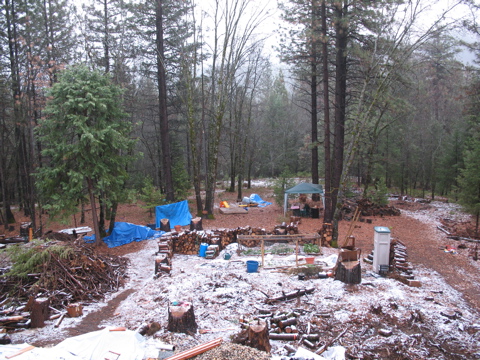
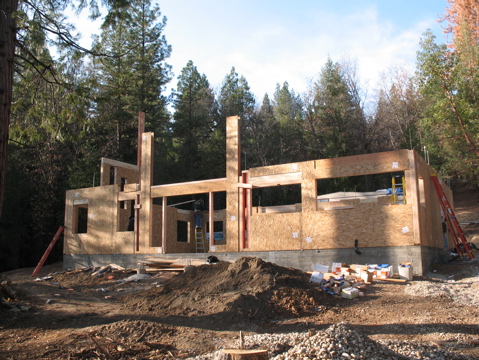
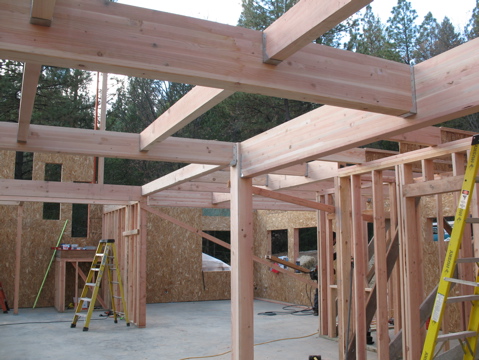
We’ve been spending a bit of time walking around the house, looking at the bare, framed walls and imagining how out stuff will fit into it. Thinking about how we’ll be using the space. Considering if it’s all “right”.

We have come to the realization that the master isn’t quite right for our bed. Amber and I bought a really nice (for us) oak, platform-style bed with attached nightstands and built in storage where the header usually is back when we moved into our first house in Felton (before Emma was born). The smallest square that will box the bed is about 8′ on a side. Our master bedroom is about 10′ deep (from the exterior wall to the bathroom wall).

This leaves us only about 2′ to walk around the bed and we just didn’t feel like it would be enough room.

After thinking about it individually, we each came to the decision that it really made sense to move the wall and make more space – and it’ll never be easier to move the wall than it is right now. It was a bit of a pleasant surprise for each of us to raise what we expected to be somewhat of a discussion point only to find out that we shared the view.

My dad and I started moving the wall about 1.5 weeks ago and it’s almost totally done now.

IMG_1752.jpg
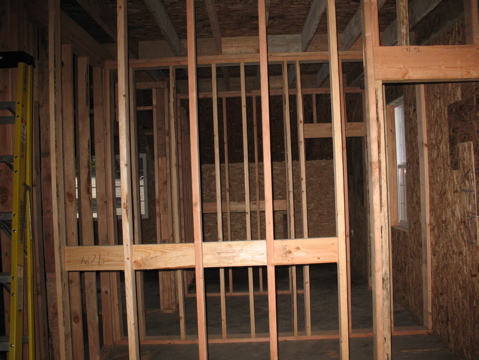
This is the best “before” shot I can find. It shows the wall between the master and the master bath.

IMG_1836.jpgThe “close” wall is the original one and the far one is the new one. We kept the door where it was and just jogged the wall back 1′ on a 45° angle to make the math and cuts easier.

IMG_1840.jpg
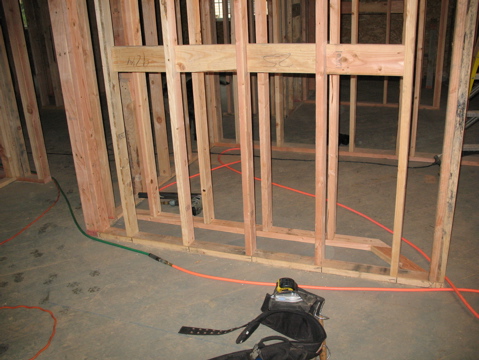
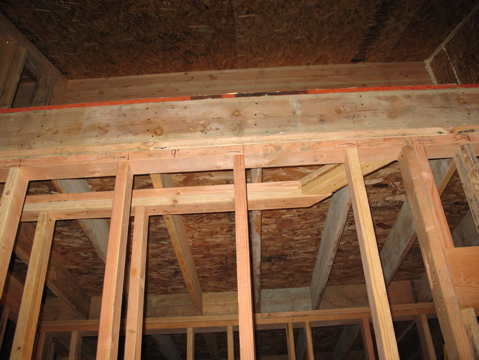
Looking up at the top plates. Since we have storage space on top of the bathroom, we’ll have to cut joists and the OSB flooring to match our new wall path.

IMG_1865.jpg
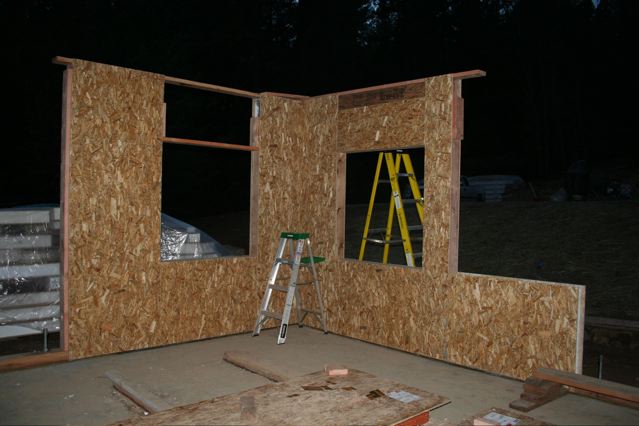
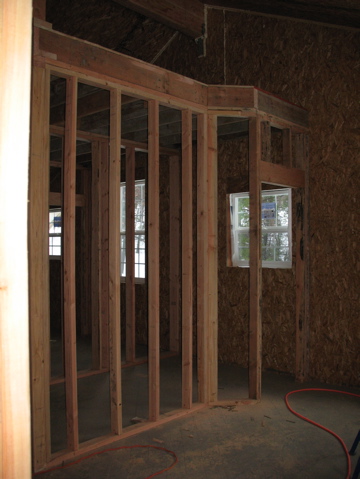
Here is the almost finished wall. You can see that the new one is built, rim joist is moved, OSB is fixed and the old wall has been ripped down. In this shot the corner near the door isn’t totally finished, but I’ve finished it since I took the picture.

IMG_1866.jpg
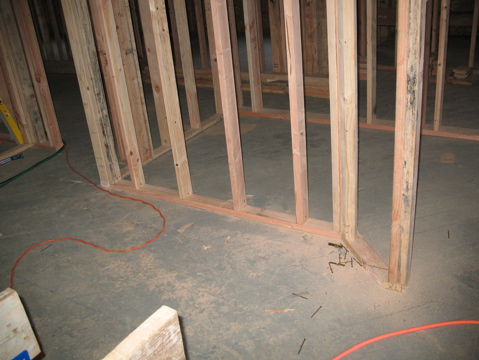
Another perspective – looking down at it.

All in all, it wasn’t a very difficult task. Pretty much just straightforward carpentry. We had to think a bit to make sure we cut things right and we removed OSB in such a way that we could trim the joists, cut the OSB down and re-attach it.

We drew an outline of the bed on the floor using a lumber crayon while we were trying to decide if we had enough space and walking around the “bed” is now much more comfortable. I think that we made a good decision and will be very happy with the results.

Everyone Needs a Home

As many of you know, we brought Joc (pronounced “joss”, short for Jocelyn) into our lives back in August.IMG_1303.jpg

Since that time she’s lived in the tent or the trailer with us. When we moved into town, she stayed on the property and for a while we were going up there mornings to let her out of the trailer and feed her and evenings to put her back in the trailer and feed her.

This worked, but it wasn’t really an optimal solution – especially when the heater stopped working due to a blown fuse.

I’d been meaning to build her a dog house for a while, but hadn’t really made time for it so I decided it was finally time.

I planned out a basic structure 48″ wide, 64″long with 30 1/2″ high walls 1 and a 5 in 12 pitch roof. The dimensions are all external and are designed to give me a good, clean 16″ on center layout for studs and sheeting. I had left over 2×6’s from the house framing so I built it with those. It gives inside dimensions of approximately 37″x55″ (which turned out to be a bigger space than I’d realized it would).I bought materials (wall and roof sheeting, insulation, extra lumber for ridge beam and fascia, and treated wood for the floor joists) and built the floor, walls and rafters in one day.

The floor is pressure treated 2×6’s with rim joists running the long way and joists on 16″ centers with 3/4 OSB on top.The long walls are tied to the short walls with overlapping top plates and I used 2 stud corners so that I could get insulation in and use less wood. I framed an 18″ wide by 24″ high opening and used a left over piece of 4×6 as a header.

There’s a 24″ overhang in front, over the opening, and an 8″ overhang in back. The other overhangs are pretty small – mainly just to keep the water from dripping down the walls which are sheeted with 3/8 OSB.The rafters are at a 5 in 12 pitch and butt up against a ridge beam The ridge beam is supported by a single 2×6 stud on each side to help keep the ridge from dropping and provide a nailing space for my gable sheeting. The ceiling is a cathedral style (following the underside of the roof – not flat) and the roof sheeting is 5/8 OSB.

Since it’s a pretty basic structure, I decided to build it with barge rafters, lookouts and a real fascia because it’s a technique I didn’t use on my workshop. All in all it worked well. I feel capable of doing it that way again on a bigger structure. I still find it pretty amazing how much I’ve learned about framing in the last 8 months or so.

It’s insulated with R-19 fiberglass insulation and we’ll get a vinyl door to help seal it.Right now, it’s just got tar paper on the roof for water proofing. Once the snow melts and the roof dries out I’ll be able to put shingles on. Since each side isn’t very big (only about 30″ by 96″) I was able to use full sheets and there’s only a small opening at the ridge.

IMG_1757.jpgThe front of the dog house with the “people house” in the background. The triangular wedges were leftover from construction and I used them to level the floor.

IMG_1758.jpg Another angle. The large overhang in front should help to keep the entry dry and provide somewhat of a shady spot in the summer.

IMG_1759.jpgLooking inside – before I insulated.


[1] Since I’ve got a 24″ tall opening, a 3 1/2″ high header and a double top plate, building a 30 1/2″ wall means I don’t have to put any top cripples in above the header.

A winter wonderland

Last night, we got our first “real” snowfall. I don’t think that what we got before counted as real, it was more of a “practice” session. We got snow both at our apartment and at the house.

IMG_1727.jpg
Looking down the driveway towards the house.

IMG_1723.jpg
Lots of the white stuff.

IMG_1728.jpg
Looking up at the south face.

IMG_1730.jpg
A possible future christmas tree.

And then there was a roof…

IMG_4845.jpg

The last few weeks have just been a flurry of activity on the house. All the walls are up, the roof panels are on, and the interior rough framing will be finished in the next couple days.

Once that’s all done (and inspected) we’re moving on to roofing and siding. We’ve got two different outfits lined up for those and after the work is done, we’ll be completely weather-tight! The can snow, storm and shed water as much as it wants and we can continue to work happily inside.

The inside work will initially consist of electrical, plumbing and planning. Plumbing will be fairly straightforward but we’ll have to figure out a few odd places and how to route pipes so that they’ll have the correct fall with minimal disruption to the structural elements. I’m sure we’ll have to build some soffits to hide things but that’s just part of the project.

Electrical work will be a challenge because we’ve got a lot of exposed ceiling and routing wires will be a challenge. I’ve got a brother who’s a commercial electrician up in Alaska and he’s going to come down and help us out for a week or so this spring. Before he comes though, we need to have everything planned and prepped as much as possible so that he can just work on what he’s good at – running wire and hooking things up correctly. I’m sure that he wouldn’t mind helping out with some construction-esque work to route the wires but there are reasons that he’s a commercial electrician, not a residential electrician.

Once all the walls are up and the space is clean and dry, we can also start planning the kitchen layout, figuring out how our flooring will be arranged and thinking about what sort of railing we’ll using on our numerous edges. The pace of work will slow down considerably but it will be more directly driven and handled just by us – a change we’re definitely looking forward to. It’s been nice (and necessary) to hire some outside help to get us to this point but I’m looking forward to getting back to our original intent of doing it ourselves.

Snow!

We had our first snowfall that we’ve seen on the property this week! It’s very exciting to be finally living in a place where it snows.

Driving up to the property on Monday morning, it really felt like winter was here as I saw small mounds of snow on the side of the road and the deep green of the evergreens was softened by a little dusting of white.

IMG_1699.jpg
This shot is from the upstairs master bedroom window looking south.

Oof, what a month…

So, I’m finally back – after a month of focus on the house. As you all read in Amber’s previous post(s) we’ve hired some people to help us put the house up. I had originally intended to start putting the house up just by myself and with family during November…that didn’t happen. We did get a few panels up over the Thanksgiving weekend, but it’s just too big of a job for weekends. We’d be at it for months and I shudder to think what the winter weather would do to it all.

So, since we hired some people, our first story walls are up, interior walls are framed, posts and beams are set (a big job), first story windows are in and work has commenced on the second story floor. I spent a week working with them then I had to go back to work.

Check out the mast and the pictures below to see how we’re progressing.

South Face
The south wall with the sun shining on it. From the right the openings are:

  1. Kitchen window, over the sink
  2. Dining room window
  3. Picture windows flanking a sliding glass door in the open area
  4. Windows on either side of where our woodstove will be in the hearth room

IMG_1683.jpg
Both Amber and I are fans of wood. We’re going to have a lot of exposed beams and some posts in the house. The GluLam in the foreground running out to the left goes out into the kitchen/dining room area. The GluLam parallel to and behind it delineates the boundary between dining room and open area. The post where the beams join is an 8×8 monster and I’m glad we didn’t go with something smaller. It looks like the perfect size for the area. The staggered windows on the left in the back will follow the stairs up.

IMG_1686.jpg
Instead of the usual OSB subfloor, we’re going with a tongue and groove 2×6 fir. This will be exposed on the bottom in much of the downstairs and will be our floor upstairs until we put a finish floor down. The big GluLam through the center of the shot separates the kitchen/dining area from a hallway of sorts. The GluLam running out to the left is the same one from before that goes out into the kitchen/dining area. I was standing in our side door when I took the shot. We’re really excited by how the flooring looks and it’s turning out just like we hoped it would.

IMG_1694.jpg
One of the coolest things about a floor like this is character. We get nice clean pieces, knotty pieces and stuff like this.

A couple pictures

Progress is being made, although we haven’t had much time in front of the computer in order share what’s happened.  My mother-in-law was kind enough to send me a couple pictures she took yesterday and I thought they were good representations of what we’ve done.

First, here’s our start on the house.  We got delivery on the 7th as planned, and it was challenging getting all the panels up to the house pad and sorted.  They are now all sorted and thanks to some family who were visiting for Thanksgiving, we were able to get a few panels up.  This is the northwest corner of the house.  The panels in the background are the second story panels.  The wood on the very top is not part of the wall, it is there to protect the panels from moisture.

img_4443.jpg
And our other big project has been working with PG&E to get our power going.  They pulled power up the hill and down to our subpanel last week, and yesterday someone came by and installed our meter.  Check it out – you don’t often get to see a meter that reads this!

img_4437_2.jpg

And yes, we have power!  Matt is doing electrical work today so that we can plug the trailer in and have some outlets down near the house pad.  I think the well is already set to go, but I’m not sure.   It will be nice not to have to run the generator all the time!

Busy Week

Well, finally, things are starting to happen! We got a septic permit this week, and we started working on that system. Our building permit should be coming any day now, and in anticipation we’ve started chalking the outline of the house and getting ready to do some foundation work.

Here’s Emma, helping with the chalk outline. The chalk comes in a big bag and you scoop it out with a cup then carefully pour it out to follow your line.

emma_chalk.jpg

Here’s the finished outline

outline.jpg

Here’s our septic tank being delivered

septic.jpg

And here’s Al moving the largest of the stumps. We had him move all the stumps that were too big for us to tackle and now we have lots of lovely clear space!

stump.jpg

And look, no stumps! Yes, I know, it is still a mess, but at least it is a mess we can deal with without large equipment.

no_stumps.jpg

And we also got gravel spread on our driveway and parking pad, so that when it rains we hopefully won’t disappear into the mud and muck.

asphalt.jpg

Pictures!

Here’s some pictures of our camp, now that we’re nicely settled.  Looking at these pictures makes me think of a squatter’s camp (as my brother said) but in person I think it is a bit more attractive.

Here’s the kitchen:

kitchen.jpg

Here’s the “living room”:

rug_area.jpg

Here’s a shot of the garden and the camp beyond:

camp_garden.jpg

And here’s Matt and his grandfather putting a roof on the workshed.

roof.jpg

And in other news we’ve submitted our corrections and we should (fingers crossed!) have our permit next week.  Yippee!   We also bought a used trailer which needs a little work (mainly in the bathroom, as far as we know right now) but the price was right and it is in good shape otherwise.  It is a 1988 23′ 5th wheel, and it will become home in another month or so.   It may sound small, but the amenities are certainly a lot better than a tent!

A Week and a Half in Pictures

Here are the pictoral highlights of our moving and settling in process. More commentary will come, but pictures tell the story pretty well.

Last shot of the kids at the door
A last shot of the kids at the door of our old place.

26 foot moving truck
We used a 26 foot moving truck to move everything.

A full moving truck
We had that sucker crammed really full, too.

The morning after our first night
Since we didn’t get up there till almost midnight, we just threw down some blankets on the floor of my unifinished workshop and spent the night there. Gregory is still underneath the blue blanket and Emma’s in her sleeping bag.

Gregory exploring the property
Gregory, beginning his exploration of the property.

Sorting tent poles
Sorting tent poles so that we can setup the big tent.

A happy boy
A happy boy waving to the camera.

A tired girl
Emma was so tired, she fell asleep in her chair.

The beginnings of our kitchen and dining room
The beginnings of our kitchen and dining room.

Starting to take shape more
Starting to take shape more. We’re using one of my work benches as a table/storage area and the barbecue has been moved down. The boxes are a key decorating accessory.

Sleeping quarters
Emma sleeps in the small tent and Gregory, Amber and I are in the big one. The carpets/rugs in between let us go from one to the other without putting on shoes or getting socks dirty.

Bed platform
We really wanted to get the tent up so that we had more space so we ended up pitching it on a bit of a slope. After two nights of having people roll into me, I built a platform to level out the space for our bed.

Play area
We’ve added some of the kids toys and shelves opposite the big tent to make this more of a play area for them.

Kitchen and dining area all decked out
This is how the kitchen and dining area are now. Notice the big 5 gallon bucket on the bench? That’s from our wine-making kit and has a spout on the bottom. I fill it (and the sun shower) at the well every evening so that we have water.

Cornbread baked in a barbecue
The remains of the cornbread that my incredible wife made last night and baked in the barbecue!