Workshop Rafters

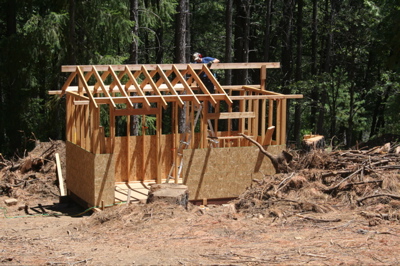
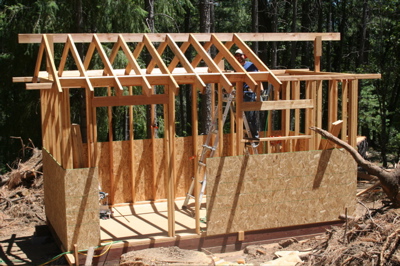
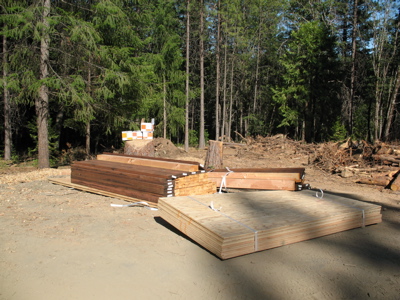
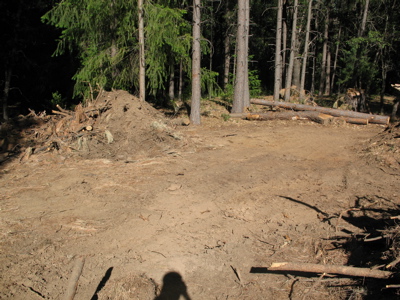
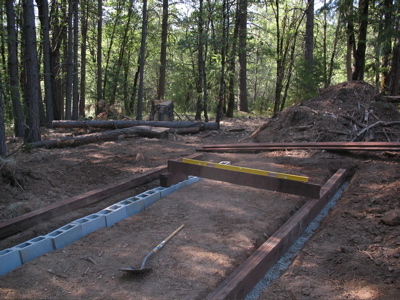
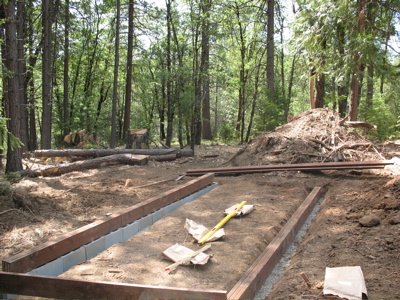
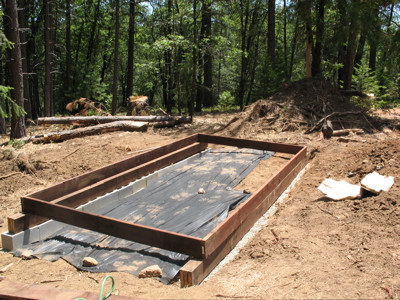
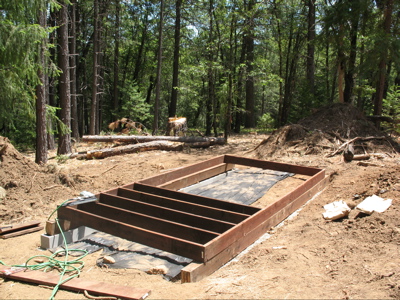
I’ve spent the last two weekends working on my workshop. The focus has largely been the roof rafters, but I did put up some wall sheathing to help keep the structure stable.

After having worked on the rafters, I’m very glad that our house will not have standard rafters with a bird’s mouth. I spent several hours looking at how my workshop book described the rafters and how to build them, trying to figure out the dimensions they provided and how I was supposed to cut them. This wasn’t all on-site, some time was before I got there.

I drew pictures. I dredged up my geometry lessons. I recalled, sine, cosine, and tangent to calculate angles. I relied on Pythagoras. I added angles to 180.

It all just didn’t seem to come out right on paper. The most confident number I arrived at seemed to indicate that I’d only have about 1/4 inch of my rafter bearing on my wall, and the rest of the bird’s mouth would be hanging out in space.

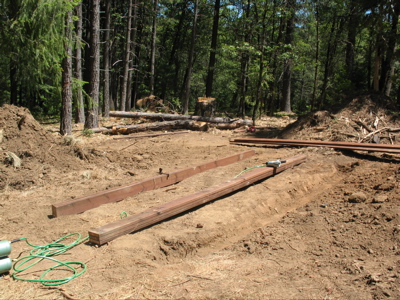
I figured maybe I was missing something in 2d that would become apparent in 3d and just took my best shot at cutting the rafters.

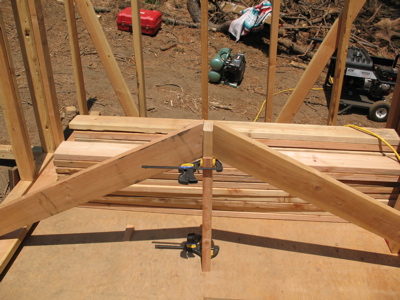
I cut them. I stood them up with a spare 2×6 to simulate the ridge board. It wasn’t right. My calculations on paper were correct and the rafter was only bearing on my wall by about a 1/4 inch on each side.

I looked back over my notes and calculations and scratched my head.

Then, I called my Uncle who lives in the area and went over to their house to see if they could help me figure out what was going wrong and how to fix it.

He took my diagram/dimensions and re-drew the rafter in his CAD software (literally, his CAD software as he helped write it). We discovered that the dimension that the book provided for the distance from the ridge board to the top of the bird’s mouth, was really the distance to the bottom of the bird’s mouth.

Fortified with proper dimensions, I returned to my campsite (since it was dark) and went to sleep.

The next day, I used my new measurements to cut another pair of rafters. With high hopes, I fitted them together…

Huh? Too far apart? My first pair were to close together (bird’s mouths were too far down the rafter). This pair was too far apart (bird’s mouths were not far enough down the rafter). What’s going on here?! Then I realized, the distance I had from my Uncle for the top of the bird’s mouth was after I’d mitered the rafter to butt against the ridge board – but I just measured that distance before I did any mitering, so I need to add 2 3/4 inches (the length of the short leg of the triangle I needed to miter off). Argh.

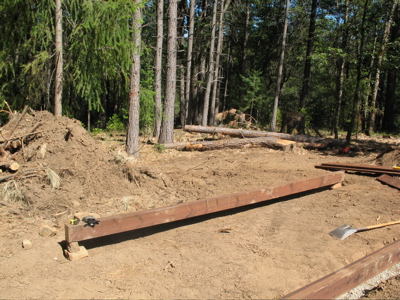
On my third try, I got the rafters cut correctly.

Testing rafter fit

This was the weekend of 7/7, 7/8 and I didn’t do much more on the workshop other than make cradles for my ridge board and start to get them set.

Last weekend (7/14, 7/15) I was able to work more effectively on the rafters since I had correct dimensions.

Nailing on rafters

Closer shot of rafters and workshop

Well Pics

I took some shots of our well when I was up there last weekend. It sure looks like a nice little package and I’m looking forward to running it.

Well Front Shot
This is the “front” of the well. The motor/pump controller is on the left, the tank is the blue bit on the right and our electical box is on the other side of the post. The big white tube is the well itself and the little white pipe is our water supply line to the house. The small grey pipe is where the electrical will come out.

Well Side Shot
A side view – you can see the electrical box on the post now. The entire system is actually supported by some metal brackets hung off the post. Before we start getting weather this fall/winter, I’ll build a small structure around everything here to protect it.

Access, Gauges and Pressure Switch
A closer view of some of the component bits. The black “knob” above the spigot is the pressure sensor. The gauge in the middle indicates the pressure and the red bit on the right is the ball valve (currently closed) which prevents the water from going into our supply line (which is wide open and would make quite a mess).

Electrical Box
Instead of the usual cut off switch, I had the pump company install a small electrical box. This way, I have space for my breakers for the light and courtesy plug I’ll be installing in the future. The light will be hooked up to a thermostat and we’ll use it to keep the pump house from freezing during the winter.

Building a workshop

I’m not sure if I’ve mentioned this before, but I have no experience building a structure bigger than a small cabinet. Given this lack of experience, it may seem foolhardy to build your own house but I’m taking it in steps.

One of these steps is to build a small workshop. In addition to giving me some building experience, I am creating a structure that I can use for tool storage and some work during construction. The plans are directly from Ortho’s All About Backyard Structures and I started building over the weekend.

The Lumber
The lumber delivery I met on Friday. This is all the lumber I need for floor, walls rafters and roof sheathing. I will need to get some additional wall sheathing.

The Building Site
The building site on Friday afternoon before I started building.

First Skid Built Up
My skids are built up from three pressure treated 2x8s. They came 20′ long and I cut them down to 18′ then nailed them with galvanized 16d short nails. You can see the trench dug for the uphill skid (nearer) and the start of a trench for the downhill skid. My nail gun is also visible in the shot and I’m very glad I had it as I never would have gotten as far as I did if I were nailing everything by hand.

Rocking up the downhill trench
My downhill trench was too deep for the skid. My first attempt to bring the downhill skid to the level of the uphill skid was to put some rocks on each end. This however seemed a bit too unstable for me and I was worried about only supporting the weight at the corners.

Cinderblocks, not rocks
I decided that I really ought to do it right so I drove back into town and picked up some cinderblocks to raise the skid up.

All leveled out
Ah, that’s much better. All leveled out and both skids in place.

The level rock
Ok, so my cinder blocks aren’t quite level…but with the help of this rock, my skids are!

Floor Joist Box
Rim and end joists are squared and nailed. My rim joists are supposed to be 16′ long. I measured the 16′ boards I received at around 16′ 1/2″ and figure that it was close enough…this is a learning experience. The end and interior joists are 93″ long.

Laying the interior joists
The interior floor joists are laid in and nailed. I knew that they were supposed to be 16″ apart and figured that 16″ on center was the same as 16″ from one side to another. I learned my lesson when I nailed down my first 4×8 sheet of 3/4″ plywood and realized that one corner wasn’t supported. The plywood ended right where the joist began. Now I have a much better understanding of how to layout a floor so that the decking that’s supposed to go on top of it gets placed correctly. I was able to mitigate the situation by adding a couple blocks cut from the 2′ cutoffs I had, but it was a bit of a pain working underneath a nailed down sheet of plywood.

The finished floor
And here it is, in all its glory. Two days of hard work and I have a good, level space built entirely by myself on a slightly sloping hillside.

What have I learned?

  • When a piece of wood is supposed to be X feet long, cut it so that it’s X feet long. Don’t just go with it as you received it because it’ll come back to bite you.
  • Make sure of your joist layout and decking coverage before you nail down your decking. Working underneath the decking is not easy.
  • When you’re trying to level something, dig much deeper than you need to and buy lots of gravel. I was trying to save both money and trips into town by making the most of my limited gravel supply and just trying to level the ground with a shovel, but it would have been much easier to just dig deep and use more gravel.
  • Reading about something is not a substitute for actually doing it. I felt like I had a pretty good grounding in what I had to do based on what I’d read, but there’s still a lot to learn by doing.
  • Nail guns are just like many hands.
  • Measure twice, cut once – Whoa, this doesn’t fit at all! Oh, the opening is 14 1/2 inches, not 14 inches…wow…how’d I make that mistake?
  • It takes longer than you expect.

Our woodpiles

With all the clearing we’ve done for the house, a lot of trees have come down. Over the weekend I took pictures of our wood piles.

The softwood pile
The soft wood (pine and fir).

 The hardwood pile
The hard wood (oak).

June 9th Picture

Apparently I didn’t spend very much time with the camera last weekend, because I have only five pictures and they are all approximately the same.

At any rate, here’s Matt feeding stuff into the chipper.  It is amazing the volume change between the piles of stuff to be chipped and the wood chips produced!  The pile you see in the lower middle of the picture is the result of at least three big piles of branches.

chipper2.jpg

As you can see, we have our work cut out for us!  The big piles you can see in the back are actually stumps, not branches.  We have yet to figure out what we’re going to do with those.

Saturday Afternoon Pictures

We didn’t end up doing anything on the property when we were up over the weekend. By the time we got the truck unloaded and returned we were tired and not ready to try to start in on any futher projects. We stopped at the grocery store, bought some beer and chips, then headed out to the property to hang out for a bit. It was really nice, although a little strange, to just be there looking around and not really doing anything in particular! The weather was beautiful – mid-70’s with a nice mild breeze. The birds were singing, the air smelled wonderful and it was an absolutely lovely day. So, without further ado, here’s some pictures.

First off, I actually got to drive onto the property for the first time! Here’s our car, parked on our parking pad.  (And yes, that’s Gregory sliding down the slope to the house site.  He made it too!)

parked.jpg

Here’s the pile of oaks just below the house site. If you compare this to previous pictures, you’ll notice that Matt has made a big dent in this pile.

wood_pile.jpg

And here’s the biggest stack of firewood… although there are several more smaller ones here and there too. Good thing we are heating with a wood stove!

big_pile.jpg

Ah, isn’t it pretty?

oaks.jpg

Trenching and pipe

Our well is a fair distance from our house site – about 600 feet and on the other side of the road. Al trenched all of this, and then another guy came in and laid pipe in the trenches so that we can have water down at the house site (sounds like a great idea, dontcha think?)

Trenching towards the house site

trenching.jpg

Trenching and pipe under the roadpipe_under_road.jpg

Filled in trenching with a line sticking up for a future spigot

filled_in_spigot.jpg

There now, wasn’t that exciting?

More site prep

And here’s what they ended up doing with that big drop-off in the last post (this is standing at the opposite end of the parking pad from where the driveway comes in) –

slope.jpg

Doesn’t that slope look much better? Notice also how the parking pad is sloped away from the house pad – this should help keep water from pooling in front of our house. Proper drainage is very important!

Here’s Al in his big tractor/earth-mover thingy (someday I should learn what that thing is called), finessing the slope. Al does great work.

al.jpg

And here’s the hammerhead Al put in to satisfy the fire department requirements. This should allow a fire truck to turn around in case they ever need to visit… which I hope they don’t.

hammerhead.jpg

Pictures from April 21st

So I’m a little behind… but now that my camera batteries are all charged I can start catching up a bit. A lot has been happening on our property since I last posted on the 17th, and here’s the first installment of pictures. These pictures are from when we were up on April 20th – 22nd.

First off, here’s the view from the stump pile. Not much has changed from this perspective, as you can see.

stump_pile.jpg

However, if we go over to the driveway, you can see some of the work that was done during the week. (Isn’t the escaping toddler cute?)

driveway1.jpg

And now you can pretend you are driving down our driveway, towards the parking and building pads.

driveway2.jpg

driveway3.jpg

And here’s the parking pad

driveway4.jpg

There’s a bit of an elevation difference between the parking and building pads (about 4-5 feet)

pads.jpg

And we have some impressive clay deposits

clay.jpg

But at least our clay comes in attractive and varied colors.