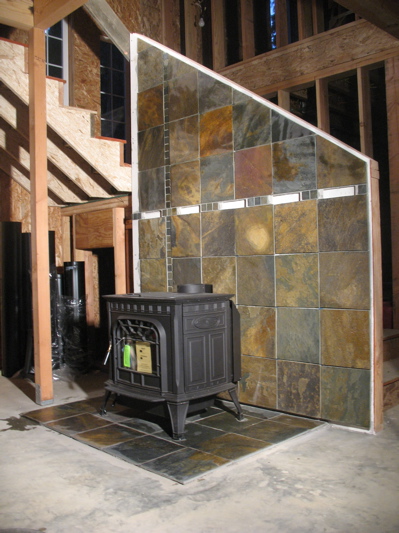
Month: September 2008
Tile pictures!
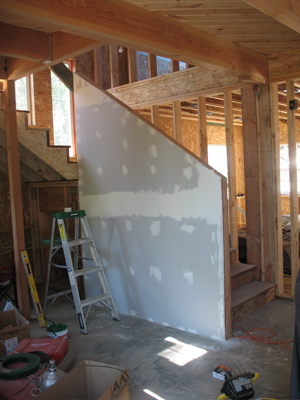 The wall behind the woodstove. Drywalled.
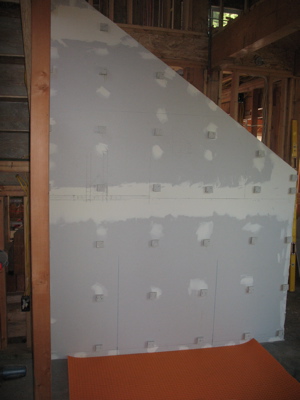 The raised squares on the wall are spacers created from 2" square pieces of backerboard. They give us the air gap needed to decrease the distance that the stove must be from the wall by approximately 60%. I cut them with the diamond blade and used regular woodworking glue to hold them in place. I shot each of them with a couple 1 1/2" staples to hold them while the glue dried. The orange bit at the bottom is the anti-fracture membrane.
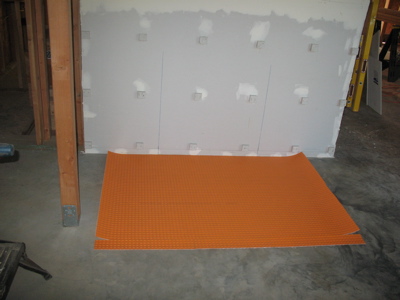 This is a better view of the anti-fracture membrane. It’s not mortared down yet, that’s why it’s rolling up at the edges. This material gets mortared to the floor and you mortar the tiles to it. With this in place, cracks that develop in the slab aren’t transmitted to the tiles.
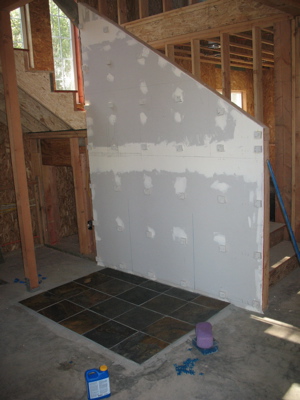 Big jump. The tiles are all mortared down and sealer was just applied (that’s why they look so dark).
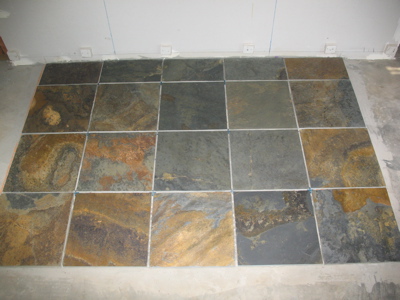 A closer look at the tiles. You can see that I had to cut the row of tiles closest to the wall. The little blue bits between tiles are spacers that we leave in and just grout over. We needed to do the floor first, partly because that’s what the stove will sit on, and party because the vertical tiles will hang over the wall and it would have been difficult to install the floor after the fact.
Holes in the Roof
This morning, the roof of our house was an unbroken sheet of shingles. Now it is pierced in three places.
Two plumbing vents went in (a 2 inch and a 3 inch) and I believe that the plumber finished his work. I need to put in a dryer vent and direct vent for the water heater but other than that the plumbing/propane should be done.
I finished wiring the boxes with the 220V futures in the bedrooms today while waiting for the stove installers at various points.
The third hole in the roof is for the wood stove chimney. The stove is in place, but the chimney wasn’t run because they didn’t have enough chimney pieces. Everything’s ready and they’ll come back out in a couple weeks to finish the installation.
A Tale of Two (times 43.5) Tiles
On Saturday I spent most of the day putting up the backer board behind the stove location. The board isn’t right on the dry-wall, it’s spaced off about an inch to create an air cavity. It went well, but took about 5 hours in total. Part of the time was due to the necessity to cut out vent holes and install some extra spacers so that I was supporting the board at the edges.
Once the board was done, I drew an outline of the wall on the floor so that we could lay out the tile. I washed tile and began positioning it. I also spent some time working on the electrical mount for the open area ceiling fan.
On Sunday, we finished laying out the tile and I started mortaring it up. I’ve never installed tile on a vertical before and it’s a bit different from doing it on the floor. The biggest difference is that you need more technique in spreading the mortar before you comb it so that it doesn’t fall down while you go. Then you need to support the initial row of tiles on the bottom so that they don’t slide off the wall.
As the title says, I got 87 tiles installed. That’s right up to the vent line. 48 twelve-inch tiles and 39 two-inchers. I had to cut a couple two inch, and the top row of 6 twelve inch tiles to get it all to fit correctly.
Yesterday, Amber sealed the tile that I’d put up. We still need to grout and we need to put up some additional tile, but we’ve got all the tile that will be behind the stove. Everything else we’ll just work around the stove (which is being installed in about an hour).
We will post pictures some day. 😉
Tile and Phone
Tuesday night I went down and scrubbed at the grouted tile with cheese cloth to get rid of the grout haze that wasn’t totally cleaned up. I also did some clean up for the plumber who started yesterday and ran a pull string for the phone service which was supposed to be installed yesterday.
Running pull string through 200 ft of conduit by yourself is a bit of a chore. I had the vacuum at the bottom and the string at the top and had to go back up a few times to free snags in the string.
Last night, Amber finished getting the grout haze off while I used the diamond blade to cut the anti-fracture membrane that was sticking out past the tile on one side. I can’t say often enough how great that diamond blade is. The whole space cleaned up well and Amber put sealer on while I went up and replaced the small, poly pull rope with mule tape. The phone guy didn’t have enough time to do the install yesterday but he came by to look at it and asked us to put in something bigger.
The phone service should be setup today or tomorrow.
The plumbing work is progressing well. It’s nice to have that taken off my plate.
Much Ado About Some Things
Floor tile layed.
Floor tile sealed.
Floor tile grouted.
Bodies feel reeled.
Friday night Amber finished laying the floor tile while I did the telecom jack in the kitchen and worked on ceiling fan mount in the master bed room.
On Saturday I:
- set a recessed light in the downstairs hallway
- sealed the tile
- continued work on ceiling fan mount in master and started on mount in open area
- Cut metal for ceiling fans in master, open area and a bedroom, drill
In the afternoon on Saturday, Amber and I worked on pressure washing the house in preparation for painting. We put up some sample colors as we begin the long process of deciding what to use. I started doing some site pickup to prepare for the paining.
This morning I built the frame for the wall between the shower and toiled in the kids bath, finished the metal pieces for the ceiling fan, planned some additional conduit work needed for phone installation, continued outside pickup.
This afternoon Amber and I tested a new main paint color, pressure washed more and grouted the tile.
We’re very pleased with how the tile is looking – as Amber said earlier “It almost looks like we know what we’re doing!”. We’ve got some pics from the process so far and we’ll get them up at some point.
Standing Walls, Cleaning and a Plumber
On Wednesday, I talked to a plumber about coming out to take a look at the house and provide an estimate on finishing the plumbing work. Since the house is a mess I went down there Wednesday night to clean it up some before our meeting Thursday morning.
I ended up simply standing the flat wall that I’d built to go between the freezer and the coat room because it was the easiest way to get it cleaned up. Then I spent a couple hours re-stacking wood, sweeping and doing general pick up. By the time I left, the house was looking in much better shape.
The meeting with the plumber went well. He said that he’d have to redo some of the waste line plumbing that I’d done (because it wasn’t totally up to code) and that he could do the water supply and propane plumbing. He gave me an outside time estimate and it would ensure that this work gets done much faster than I could and to a level that I probably couldn’t do. Both Amber and I are ready to move forward with it, it’s just a matter of taking a look at our finances and seeing how we can fit the cost in.
I’ll be finishing the tile under the woodstove and hopefully doing some grouting this weekend in addition to more electrical. The the vertical for the woodstove wall will start next week.
Wall Builder, Tile Layer
Put together the wall bits to go between the freezer and the mudroom. It’s a combination of a flat wall (1 1/2″ wide instead of 3 1/2″ wide) and a short (3 1/2″ square) extender wall. Studs in flat wall are a bit tweaked so I piled some wood on to try to straighten the wall out.
Mixed thinset and laid 14 of 20 slate floor tiles to go under the woodstove.
Worked up list of stuff remaining to do for the house, short term, with Amber’s help.
