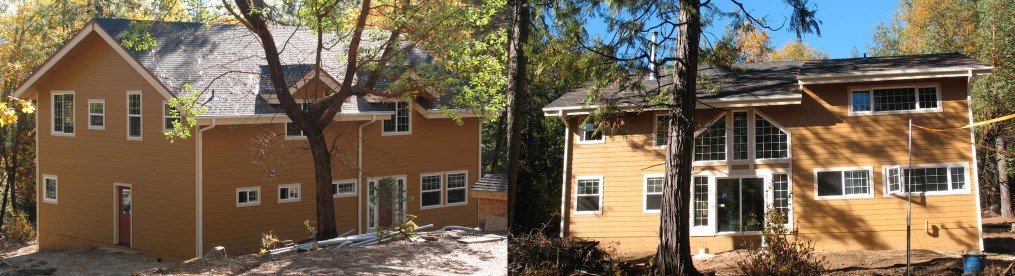
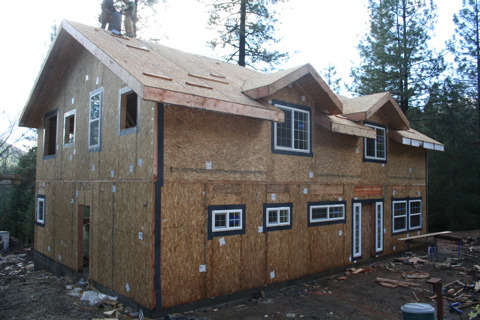
I just updated the mast image to better reflect the current state of the house – sided and roofed.
The new mast image was taken on 2/3/2008 at about 8:15 AM PST looking South.
I just updated the mast image to better reflect the current state of the house – sided and roofed.
The new mast image was taken on 2/3/2008 at about 8:15 AM PST looking South.
I feel like the month of January was mostly a time for catching our breath and figuring out what’s next.
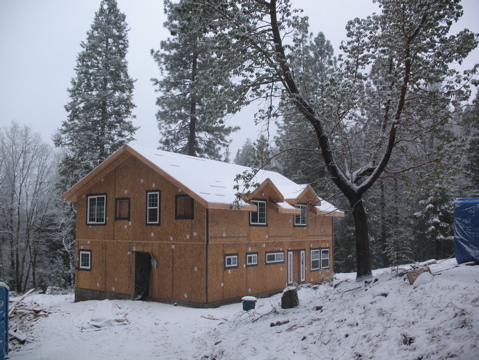
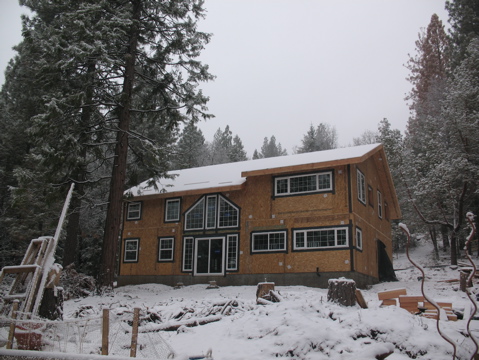
The structure is totally up (walls and roof). Most internal framing is done. The roof material is on and most of the siding, trim and fascia are done. External doors are hung, windows are in and we’re totally dried in.
Next comes plumbing and electrical. We’ve been planning our electrical setup and the DWV lines that we’ll need to run and the implementation of these plans should start in earnest this month.
As many of you know, we brought Joc (pronounced “joss”, short for Jocelyn) into our lives back in August.
Since that time she’s lived in the tent or the trailer with us. When we moved into town, she stayed on the property and for a while we were going up there mornings to let her out of the trailer and feed her and evenings to put her back in the trailer and feed her.
This worked, but it wasn’t really an optimal solution – especially when the heater stopped working due to a blown fuse.
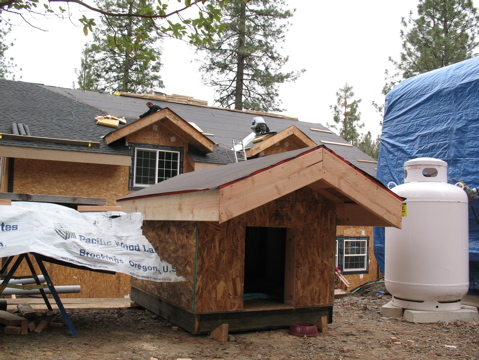
I’d been meaning to build her a dog house for a while, but hadn’t really made time for it so I decided it was finally time.
I planned out a basic structure 48″ wide, 64″long with 30 1/2″ high walls 1 and a 5 in 12 pitch roof. The dimensions are all external and are designed to give me a good, clean 16″ on center layout for studs and sheeting. I had left over 2×6’s from the house framing so I built it with those. It gives inside dimensions of approximately 37″x55″ (which turned out to be a bigger space than I’d realized it would).I bought materials (wall and roof sheeting, insulation, extra lumber for ridge beam and fascia, and treated wood for the floor joists) and built the floor, walls and rafters in one day.
The floor is pressure treated 2×6’s with rim joists running the long way and joists on 16″ centers with 3/4 OSB on top.The long walls are tied to the short walls with overlapping top plates and I used 2 stud corners so that I could get insulation in and use less wood. I framed an 18″ wide by 24″ high opening and used a left over piece of 4×6 as a header.
There’s a 24″ overhang in front, over the opening, and an 8″ overhang in back. The other overhangs are pretty small – mainly just to keep the water from dripping down the walls which are sheeted with 3/8 OSB.The rafters are at a 5 in 12 pitch and butt up against a ridge beam The ridge beam is supported by a single 2×6 stud on each side to help keep the ridge from dropping and provide a nailing space for my gable sheeting. The ceiling is a cathedral style (following the underside of the roof – not flat) and the roof sheeting is 5/8 OSB.
Since it’s a pretty basic structure, I decided to build it with barge rafters, lookouts and a real fascia because it’s a technique I didn’t use on my workshop. All in all it worked well. I feel capable of doing it that way again on a bigger structure. I still find it pretty amazing how much I’ve learned about framing in the last 8 months or so.
It’s insulated with R-19 fiberglass insulation and we’ll get a vinyl door to help seal it.Right now, it’s just got tar paper on the roof for water proofing. Once the snow melts and the roof dries out I’ll be able to put shingles on. Since each side isn’t very big (only about 30″ by 96″) I was able to use full sheets and there’s only a small opening at the ridge.
 The front of the dog house with the “people house” in the background. The triangular wedges were leftover from construction and I used them to level the floor.
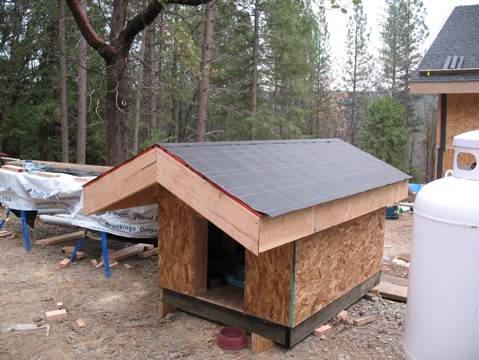 Another angle. The large overhang in front should help to keep the entry dry and provide somewhat of a shady spot in the summer.
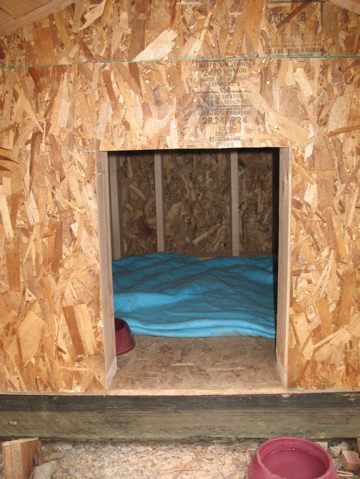 Looking inside – before I insulated.
[1] Since I’ve got a 24″ tall opening, a 3 1/2″ high header and a double top plate, building a 30 1/2″ wall means I don’t have to put any top cripples in above the header.
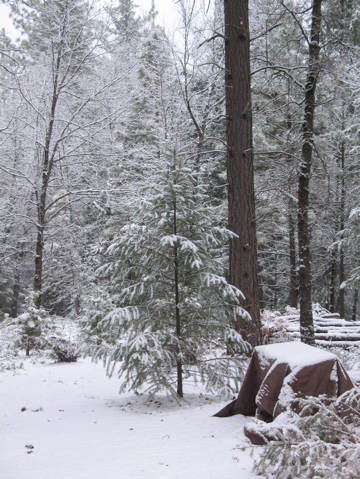
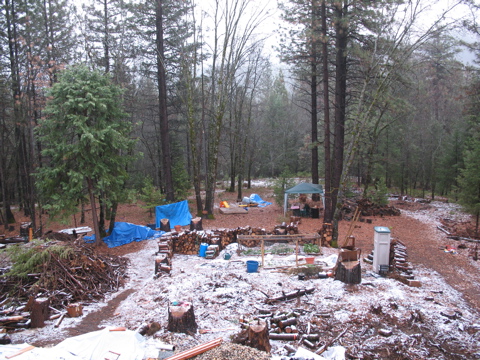
Last night, we got our first “real” snowfall. I don’t think that what we got before counted as real, it was more of a “practice” session. We got snow both at our apartment and at the house.
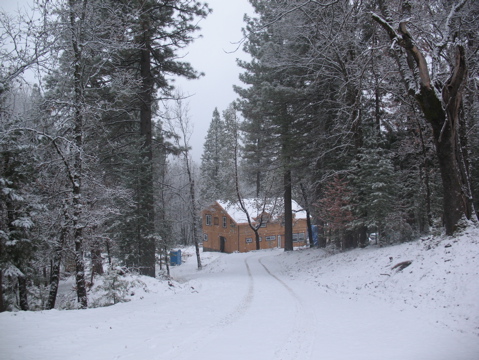
Looking down the driveway towards the house.
Lots of the white stuff.
Looking up at the south face.
A possible future christmas tree.
The last few weeks have just been a flurry of activity on the house. All the walls are up, the roof panels are on, and the interior rough framing will be finished in the next couple days.
Once that’s all done (and inspected) we’re moving on to roofing and siding. We’ve got two different outfits lined up for those and after the work is done, we’ll be completely weather-tight! The can snow, storm and shed water as much as it wants and we can continue to work happily inside.
The inside work will initially consist of electrical, plumbing and planning. Plumbing will be fairly straightforward but we’ll have to figure out a few odd places and how to route pipes so that they’ll have the correct fall with minimal disruption to the structural elements. I’m sure we’ll have to build some soffits to hide things but that’s just part of the project.
Electrical work will be a challenge because we’ve got a lot of exposed ceiling and routing wires will be a challenge. I’ve got a brother who’s a commercial electrician up in Alaska and he’s going to come down and help us out for a week or so this spring. Before he comes though, we need to have everything planned and prepped as much as possible so that he can just work on what he’s good at – running wire and hooking things up correctly. I’m sure that he wouldn’t mind helping out with some construction-esque work to route the wires but there are reasons that he’s a commercial electrician, not a residential electrician.
Once all the walls are up and the space is clean and dry, we can also start planning the kitchen layout, figuring out how our flooring will be arranged and thinking about what sort of railing we’ll using on our numerous edges. The pace of work will slow down considerably but it will be more directly driven and handled just by us – a change we’re definitely looking forward to. It’s been nice (and necessary) to hire some outside help to get us to this point but I’m looking forward to getting back to our original intent of doing it ourselves.
We had our first snowfall that we’ve seen on the property this week! It’s very exciting to be finally living in a place where it snows.
Driving up to the property on Monday morning, it really felt like winter was here as I saw small mounds of snow on the side of the road and the deep green of the evergreens was softened by a little dusting of white.
This shot is from the upstairs master bedroom window looking south.
So, I’m finally back – after a month of focus on the house. As you all read in Amber’s previous post(s) we’ve hired some people to help us put the house up. I had originally intended to start putting the house up just by myself and with family during November…that didn’t happen. We did get a few panels up over the Thanksgiving weekend, but it’s just too big of a job for weekends. We’d be at it for months and I shudder to think what the winter weather would do to it all.
So, since we hired some people, our first story walls are up, interior walls are framed, posts and beams are set (a big job), first story windows are in and work has commenced on the second story floor. I spent a week working with them then I had to go back to work.
Check out the mast and the pictures below to see how we’re progressing.
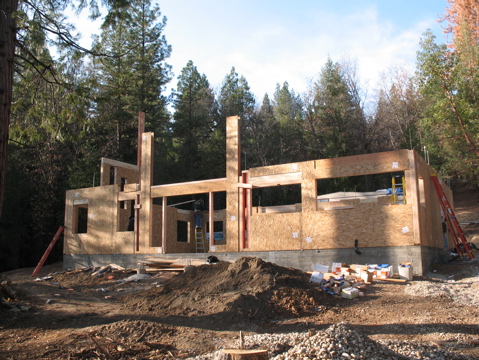
The south wall with the sun shining on it. From the right the openings are:
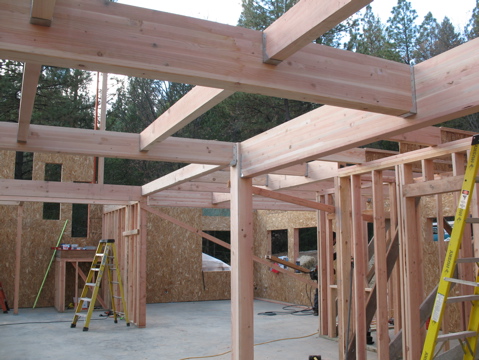
Both Amber and I are fans of wood. We’re going to have a lot of exposed beams and some posts in the house. The GluLam in the foreground running out to the left goes out into the kitchen/dining room area. The GluLam parallel to and behind it delineates the boundary between dining room and open area. The post where the beams join is an 8×8 monster and I’m glad we didn’t go with something smaller. It looks like the perfect size for the area. The staggered windows on the left in the back will follow the stairs up.
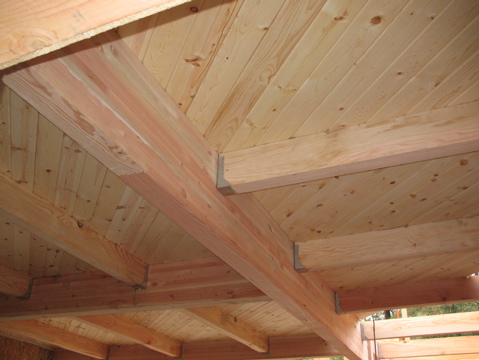
Instead of the usual OSB subfloor, we’re going with a tongue and groove 2×6 fir. This will be exposed on the bottom in much of the downstairs and will be our floor upstairs until we put a finish floor down. The big GluLam through the center of the shot separates the kitchen/dining area from a hallway of sorts. The GluLam running out to the left is the same one from before that goes out into the kitchen/dining area. I was standing in our side door when I took the shot. We’re really excited by how the flooring looks and it’s turning out just like we hoped it would.
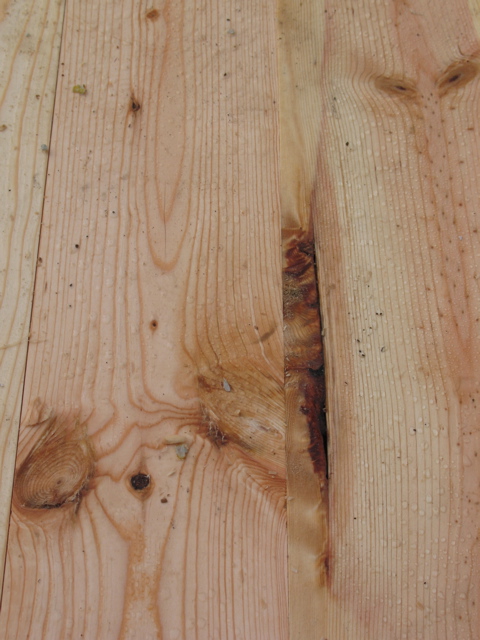
One of the coolest things about a floor like this is character. We get nice clean pieces, knotty pieces and stuff like this.
Well, all the hard work from the last couple months has payed off. We now have a poured slab and we’re ready to move on to the panels.
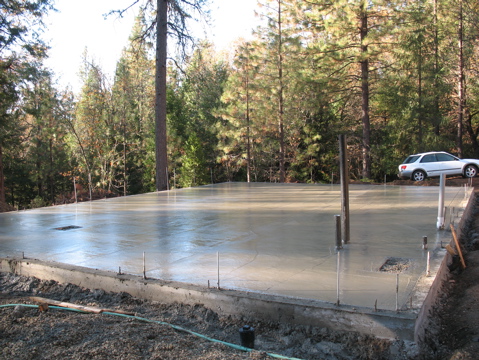
This picture is from shortly after the slab was poured so it’s still very wet looking.
We’ll put together a more detailed post with pictures from the flurry of work in the last couple weeks getting to this point, but I wanted to get the slab shot up there.
Our panels arrive on 11/7 and then our house will really start to take off.
Finally, the mast image does actually represent our house! That’s my dad and me working on the form boards and my maternal grandmother sitting in the chair watching.
Every house starts with a foundation. It’s where the structure meets the earth.
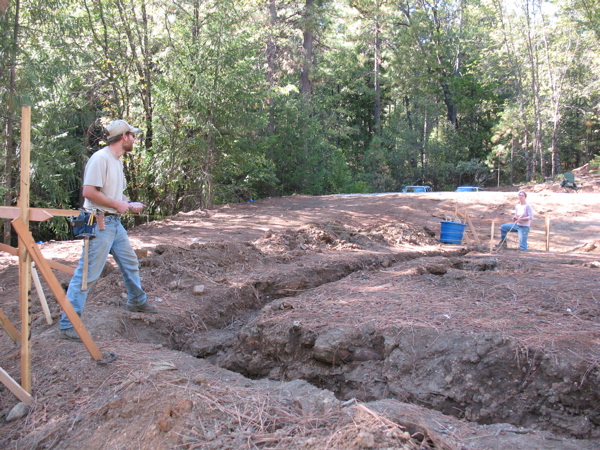
Our foundation started with stakes and strings to mark the general position of the house (accurate to a couple inches). Then we chalked over the strings.
The chalk marks showed where to dig our footings. Our footings have been dug and we’ve embarked on the wonderful world of batterboards and stringlines.
A batterboard is a simple structure made of stakes. Its purpose is to provide a stable place to tie a string to so that you can mark the actual dimensions of the foundation.
We have two styles of batter boards:
* short
* tall
The short batter boards are made of 3′ stakes and they’re used on the high ground (where we don’t have a stem wall, the slab just flows down into a footing).
The tall batter boards are made of 4′ stakes (some with a couple additional 3′ stakes to give us the height we need) and they’re used on the low ground (where we have an actual stem wall).
Once the batter boards are setup then you need to start setting, measuring a moving strings. These strings define the actual dimensions of your house so they have to be really accurate.
We started out this process by putting the strings where it made sense, then measuring our distances to try to get the dimensions correct. After moving a few of the strings this way, we realized that this really wasn’t the way to go about the process. You really have to get your corners set at 90 degrees, then start moving both ends of a line to get your dimensions.
So, how do you get your corners to be 90 degrees? Geometry. A 3-4-5 triangle has a 90 degree corner between the 3 and 4 legs. Since our house is a basic 32’x47′ rectangle, we used 30-40-50 triangles. We measured 30′ out on the short side, and put a piece of tape on the string. Then we measured 40′ out on the long side and put another piece of tape on. Then, we measured the diagonal. If it’s longer than 50′, the angle is obtuse; if it’s shorter than 50′, the angle is acute. If it’s exactly 50′, then we have a 90′ angle.
It took us a lot longer than we expected to get our strings set. It’s a surprisingly difficult activity and we had several weather delays.
Once the strings were all set, we were able to move onto the fun part of actually building something…