Electric Tile Pick and Wash

I layed out all of our slate tiles this morning and sorted them by good for the floor (relatively even and standard thickness) and better for the wall (not). Then I pulled out the romex that was going through the conduit for the island future and replaced it with metal-clad as I don’t think it’s code to run bare romex through conduit like that.

After lunch (and after finishing emptying our storage unit) Amber and I selected the lucky tiles to make up the floor under our woodstove. We arranged them all on the space we’d prepared and I cut one (3 full rows and one half-ish row) to see how that would go. All I have to say is that a diamond blade on a 4 1/2 angle grinder seems like it’ll cut pretty much anything.

After dinner, I finished cutting the remaining tiles, read up on the procedure for setting them, and then washed and dried them and labeled them for future placement.

Yes, Virginia, We are Still Building a House

In the past it’s been my preference to blog about big items done on the house. Major things, accomplished in a set timeframe. However, those sorts of posts usually require a commensurate amount of time to blog about them and in the past few months it’s just felt like too much.

I’ve been thinking about this, the lack of communication and what to do about it, and I’ve decided to not sweat the big stuff. I’m going to blog after I work on the house.

It may be a sentence, it may be a paragraph, it may be a full blown post with pictures and everything. The important thing is to put the info out, in whatever form.

To start with, I’m just going to run down a list of little things that we’ve accomplished in the last few months that I haven’t been blogging.

In no particular order:

  • False 2×4 wall built inside the away room against the pocket doors so that we have a place to put a switch and plugs without interfering with the pocket door opening.
  • Wired away room ceiling fan box and can lights.
  • Moved chest freezer up from Livermore where Amanda and Tristan were keeping it for us. Installed it in the house. Realized that the current framing only gave us 1/2″ on either side (without drywall). Tore out a wall between utility room and coat room. Have plans to rebuild it to gain us about 1″ on either side (with drywall). Will still need a vent through the wall into the main living space so that the freezer doesn’t overheat.
  • Ran electrical through the wall for all exterior lights.
  • Put in boxes for most telecom points and pulled wire into boxes – only kitchen and hearth room left.
  • Extended the telecom point in the away room after deciding on a better location
  • Talked with a guy about best way to mount ceiling fans in a SIP roof.
  • Talked to a guy about painting the exterior. That will happen in late September, but we need to do some cleanup before then.
  • Reinforced the wall that will be between the wood stove and the stairs with a sheet of OSB to stiffen it up.
  • Dry walled it with my Grandfather.
  • Bought backer board and started cutting it to create a channel for air flow and sections to set slate tile on. Realized that scoring and snapping was likely to give me an RSI and was painfully slow. Bought a diamond blade for my angle grinder. Cut about 180 two-inch squares in about an hour.
  • Cleaned the floor where the woodstove will go. Mixed thinset. Put down thinset and the anti-fracture membrane. Prepped for slate tile installation so that it’s ready for our woodstove arriving in about 2 weeks. All a joint project with Amber and the first time we’ve done any tile work.
  • Primed exterior door jambs.
  • Mounted boxes for smoke detectors. Some of which are about 12 feet off the floor.
  • Planned location of water heater and some shower valves.
  • Drilled holes for PEX piping.
  • Soldered faucet stub outs to copper banding in preparation for supply line plumbing.
  • Discovered that plumbing is harder than electrical – seriously considering subbing it out.
  • Roughly rough framed the window seat and bookshelves with overhang for lights that we’ll have on the landing upstairs.
  • Installed and wired boxes for most of the non-ceiling fan lights.

Memorial Day Weekend

We took the opportunity of the long weekend and my Dad being in town to try to focus on the house. I got back into rough carpentry mode for a bit before putting my electrician and plumbing hats back on. I also got to try on a circus high wire hat – that’s one I don’t want to use again but I fear that I have no choice.

Since we’re putting a wood stove near our stairs, we need to build a wall behind it to protect the stairs from the heat and anyone from putting an arm through the stairs onto the stove. Instead of trying to mix a small protective wall with a banister and balusters we decided to just make a bigger wall and hang the banister off of it. We thought it would look better that way – less haphazard. I bought wood and cut it all on Friday. On Saturday, I assembled it and my Dad helped me put it in place and get it plumb. Sunday found me adding the fire blocks and yesterday, I pulled out the topmost fireblock to beef up the tallest stud into more of a corner so that there’s a place to mount the banister. It looks good, but I’m fairly out of practice at carpentry because it should have gone a lot faster than it did. I still need to get some OSB to take the wobble out of the lower end.
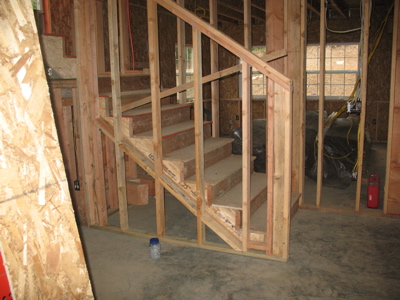
IMG_2072.jpg

At one point, while take a break from carpentry, I went up and began manipulating the hot and cold water lines for the toilet and bath in the kids bathroom, attempting to force them through the holes in the stud and floor that I’d drilled for them previously. During the course of my wrestling, the cold water line came loose from the T that I (thought) I had crimped it to before I laboriously moved the tub into place. After examining the crimping ring (it’s PEX) I discovered that I had not in fact crimped it. I took apart the waste line plumbing (that I had just dry-fit, not glued) and proceeded to laboriously move the tub out of the way enough to get at the plumbing bits behind it so that I could check the other fittings to make sure they were crimped and fixed the one I disturbed. Now, I say “laboriously” because this is a cast iron tub which weights somewhere between 450 and 600 pounds depending on which literature or sales person you believe. The only way for me to move it by myself is to use the 1/2 of gap or so on either side (since it’s installed in an alcove) and slowly inch it out. First one side. Then the other side.

I did get the tub out and got my 3/4″ cold line fixed and discovered that I hadn’t crimped the 1/2″ cold line to the toilet so I fixed that too. I then proceeded to fold the 1/2″ hot water line to the shower back on itself and put a kink in it. This necessitated pulling the whole bit out and replacing it with an un-kinked bit.

This pretty much soured me on plumbing for the weekend so it was fortunate that I had a lot of electrical work to do.

I pulled wire for lights in the master and began drilling and pulling wire for smoke detectors in the bedrooms. I also finished getting the scaffolding together to perform my death-defying high wire work.

We have vaulted ceilings. We are quite enamored with our vaulted ceilings. They make the house look large and spacious inside. They make the wiring a bit of a challenge, but we’ve managed so far. Our vaulted ceilings are about 23′ off of the concrete slab at their highest point. We want a ceiling fan above the open area to help move the air around and help keep our climate nice in the house.

Originally, I’d been planning on using furring strips to great a gap for the wire and just hang drywall from them. I realized however that we’d have to do furring strips across a very wide space of ceiling, some of it 23′ up in the air and perhaps the ideas should be rethought. My second idea was to use the chases in the SIP panels where possible and furring strips only where I had to. This has worked out much better.
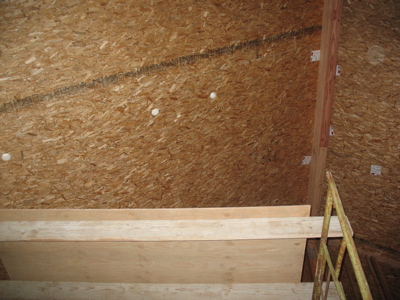
IMG_2070.jpg

This shot is standing on the concrete slab, looking up past the scaffolding at the roof. The three white circles are where we’ve drilled the ceiling panel are about 3 1/2″ in diameter to give you a sense of scale. Now, the thing with pushing a fish tape through a styrofoam panel is that sometimes it gets hung up – especially when you’ve got a 12′ run in a 7-in-12 roof. Every time it gets hung up, you have to decide if it’s something you can fix by just wiggling around a little or if you have to figure out where it’s hung up and drill a new hole to “unhang” it. Between our top and bottom holes, we had to drill 3 other holes to get the fish tape unhung.
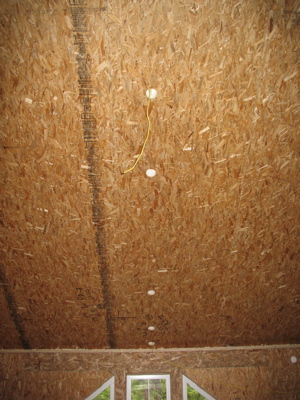
IMG_2080.jpg

This was shot from the second story walkway and you can see all 5 holes in a neat line. There is about 2′ of 12-3 romex in a yellow sheath hanging from the topmost hole and a line leading from the bottom hole off to the right.

Now, you may be wondering how exactly I was able to work on this? Well, fortunately I was able to borrow some scaffolding from the guys who are building my parent’s house.
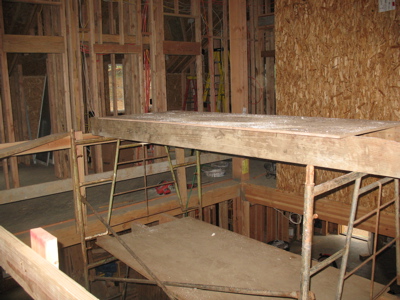
IMG_2081.jpg

This is shot from the 2nd story and you can see how the upper platform is above the railing for the 2nd story walkway. I spent a good number of hours up there yesterday, wrestling with the drill, the cord, a small ladder to gain a couple extra feet at the tallest point, and my dislike of high places. Fortunately, I’m still here, the wire is all pulled and I won’t have to get back up there until I learn how to install a ceiling fan box in the panel in such a way to support the fan adequately – probably later this week.

Now, there are two rooms that really will only work to wire with furring strips – the two bedrooms with dormers. My dad and I spent additional time yesterday working on that.
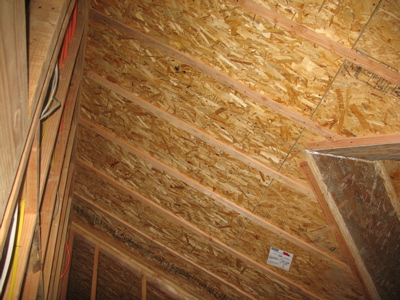
IMG_2075.jpg

These are 1x4s that my cousin and I ripped in half weeks ago. We spread subfloor glue on one side, and nailed the up. The nails should hold them while the subfloor glue dries and I’ll go back and put a few screws in later just to make triply sure that they hold. I’ll run the wire down center channel where the peak is and the ceiling fan will mount to a block of wood I’m going to anchor into the peak there.

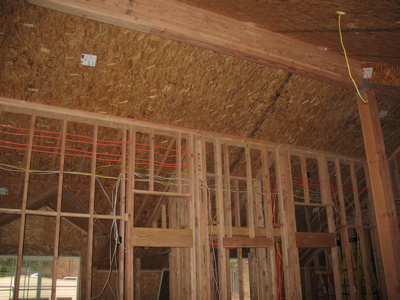
Finally, here’s a shot clearly showing the ramifications of not having an attic space for wiring.
IMG_2079.jpg

The orange cables are network and comm lines. The white is 14-gauge romex and the yellow is 12-gauge. These walls are not load-bearing – they’re just to delineate the rooms and provide a place to hang drywall.

The Tortoise

We are still here. We are still working on the house. It’s just progressing slowly.

Between going out of town for a wedding, being sick, spending most of a weekend looking for a lost pair of glasses (found, by the way) and being very busy with work, we haven’t been able to get as much work done on the house as we’d hoped.

So, what is our progress?

We’ve been continuing with electrical work. I’ve been making up boxes and making sure that I understand where all the wires run and what they’re for. Yesterday, I showed Amber how to run wire and make up a box so that she can work on that while I work on other stuff. I installed switches for the lights that we have in so that I don’t have to keep turning them on and off via the breakers.

While drilling holes for our network cable, I uncovered a problem with a plug that I’d previously wired. I plugged in my drill and pulled the trigger, but nothing happened. After verifying that my drill was still OK, I tested the voltage at the plug and discovered that it was only 104V, not the expected 120V. This particular plug is a significant juncture. There’s a 12/3 wire coming in (two circuits) and since I’ve got a pigtail, 1 line out to circuit A and 2 lines out to circuit B there are 5 different wires to get into the neutral wirenut. After unscrewing the wirenut, I realized that the neutral from the supply wasn’t making good contact with the other wires. I upsized to a larger wirenut and everything worked correctly, but it took some time to figure out the problem, determine the appropriate solution and get everything back into the box and the plug back on without any voltage drop due to bad contacts. I learned from the experience and it felt good to be able to troubleshoot and fix the problem on my own.

As a family, we tend to be fairly technologically oriented. I wanted to have network cable in the house, we need phone cable and (though we aren’t likely to use it) we decided to run coax cable. Since we have no attic space and very little subfloor, there’s a lot of holes to drill in studs. I found a neat cable at our local electrical and network place that has 2 CAT-5E and 2 RJ6 (coax) cables in one sheath. The 500′ spool will be enough for us to do the entire house and since I’m doing every room as a home run from a central location it’ll be easy to manage it all in the future. Almost all of the cable is run, I just need to finish drilling for the kitchen and pull the cable there.

On the plumbing front, Amber and I have been continuing to work on the vent lines. Last weekend I had her run the chop saw and cut lengths while I measured and fit them. This worked well till I needed a 9′ length of pipe for a long run and we only had 6′ left.

While my brothers were out in March, we purchased our upstairs bathtub and put it in place. Yesterday I marked the locations for the drain and overflow pipes while the tub was in place, then managed to move the 316 pound behemoth out of the way to drill them out and cut the floor between the holes for the connecting pipe. Once we get a couple more plumbing bits, we’ll be able to hook up that drain and almost all of our waste plumbing will be done – just the vents and the drain for the downstairs shower will be left.

Yesterday, I also started work on supply line plumbing. I’ve had the parts for a while now but have been focusing on other stuff. I realized yesterday that I should do the supply plumbing behind tub before putting the tub in place because it’ll be easier. I ran into a slight problem with the crimping tools I’m borrowing for the PEX in that they don’t seem to open wide enough to go over the pipe mid-run – they seem to have to slide on from one end which doesn’t work with how I need to use them. I found a set online that I think will work, but they cost $250 so I’m going to talk to the guy I’m borrowing the tools from to be sure I’m doing it right before I make any “sudden moves”.

Outside, we did some landscaping with my parents’ tractor last weekend when Steve and Val were up visiting. We moved a bunch of the leftover leach field drain rock to a pile outside of our future garden site. Then we put the teeth into the grader box and “smoothed out” the rents in the earth created when the grade-all that was used to set our roof panels got stuck back in December. Emma was a bit sad to see her pond sites go away, but it really does look better now and it doesn’t provide a breeding place for mosquitos anymore.

We’re just pushing on with the in-the-wall and ceiling stuff. We need to get all of that finished for our rough inspections before drywall. At this point, I’m not entirely sure when that will be, but I’m betting on July. Once work slows down (mid-May I think) I’ll be able to work on the house in the evenings again and not just on the weekends.

Yes, it’s taking a long time, but every day I work on the house – every time I get a little further and can sit back and look at something I did or built or assembled, I feel good about it. It’s an amazing feeling to sit back and look at the bigger picture and see how much you’ve accomplished.

For some time I’ve believed that I can do anything if I work at it and try hard enough. Yes, it may take me a while. Yes, I’ll have to learn new things. Yes, I’ll make mistakes. But I can do it. This experience with the house is simply reinforcing my belief.

Electrical week

My brother is flying home to Alaska today after a very busy and productive week of electrical work.

The panel is fully wired and we have homeruns going out to at least the first box for each circuit. Not all circuits are fully wired but I feel confident to be able to take over circuit wiring and finish it off.

There are 4 lights in the house now, 2 downstairs and 2 up. I wired 3 of them (one of which was on a 3-way switch) and it’s very nice to have lights that don’t take up precious plugs in the extension cords.

We have run many hundreds of feet of wire and drilled many holes in studs. One of the downsides of having cathedral ceilings is that you have to run a lot more wire in the walls because you don’t have an attic space to go up and down into. Also, since we have some exposed subfloor below, we have to be careful in our measurements on where to drill from the top down to bring wires up from below.

I’ve wired up a second plug in the house so that we have power upstairs as well as down without having to run an extension cord. Later today I plan to run circuits out to the rooms where we haven’t finished wiring yet so that we at least have loops at all the plugs and lights even if they’re not made up.

I’ll write up a future post about the actual wiring itself – stud walls vs SIP walls and what we’ve done to make the wiring job easier.

Power *in* the house!

My brother Chris is in town this week and we’ve been working on electrical for the house (Chris is a commercial electrician). Yesterday we got the sub-panel in the house hooked up to the main panel at the meter and we wired a plug so now we have power inside the house.

It’ll be really nice not to have to run an extension cord outside to the temporary job site power that I setup back in November.

DWV Tools

While working on the DWV plumbing, I’ve found some tools to be extremely useful to have around. Most I expected but some were a surprise.

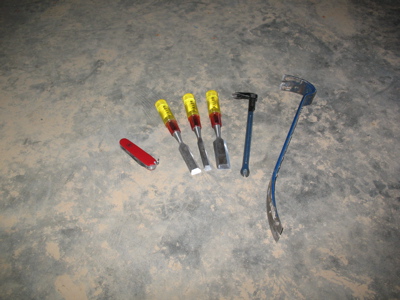
IMG_1954.jpgA selection of hand tools. I used the awl on my pocket knife (far left) to help get the disks out of the hole saw. The chisels were what I was most surprised to need. I ended having to cut a small notch into a beam to get some fittings in the right place as well as tear out a bit of drywall backer on the ceiling. Throughout the construction process I’ve found chisels to be amazingly versatile and helpful to have around. I won’t ever start a construction project without a chisel or two in my bags. The nail pullers/pry bar were helpful both in removing studs (I put them back after I got fittings in place) and for helping to tear out the drywall backer same as the chisels. I even used the small puller to help get some recalcitrant hole saw slugs out of the hole when there was an errant nail keeping them down.

IMG_1959.jpg
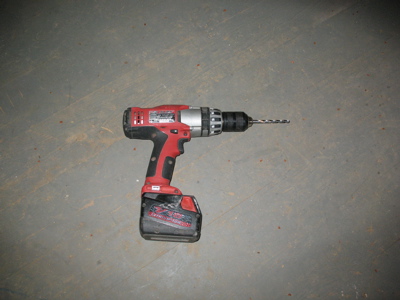
When you need to make a hole to carry a pipe from downstairs to upstairs and there’s no room to drill it from downstairs, how do you know you’re drilling in the right place? My method is to mark the whole location on the bottom of the floor and measure off the nearest (exterior) walls to wee where it should go upstairs. Then I climb down off my ladder, trudge upstairs and measure off the walls again to get a mark on the top of the floor. Now, I have a mark on the bottom, and a mark on the top, but no idea how well lined up they are. In comes the cordless drill with the 1/4″ bit. Just drill on my top mark, go back downstairs and see how close I am to my bottom mark and adjust accordingly when I drill with the hole saw.

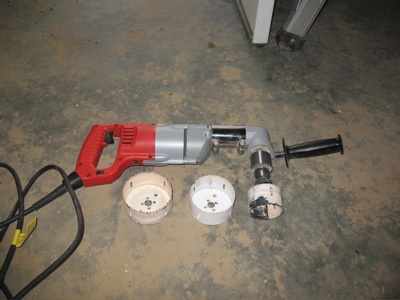
IMG_1961.jpgAh, here’s the tool. I just bought this a couple weeks ago when I realized that I’d have to be doing a lot of drilling between studs and it wouldn’t really work to just keep borrowing one or renting one. I’ve already used it a whole lot and can’t imagine building a house without one. For the uninitiated, it’s a right angle drill. This particular model is more on the prosumer level. It’s not as big, beefy or speedy (or heavy) as the Hole Hawg (also from Milwaukee) but it’s also not as expensive and serves my needs admirably. The main drill body puts out 500 RPM at full go (variable speed controls in the tirgger) and the right angle adaptor (removable) has gears in it so that it can act as a reducer (300 RPM) if you put it on one direction and an increaser (I know that’s not the right word…) (700 RPM) if you flip it the other way. Since I’m mostly doing low torque drilling with hole saws, I’ve just got it on the high configuration. There’s a 2 3/4″ hole saw in the chuck and a 4″ and 3 5/8″ hole saws next to it. I used the bigger hole saws for 3 inch pipe and the smaller one for 2 inch.

IMG_1962.jpg
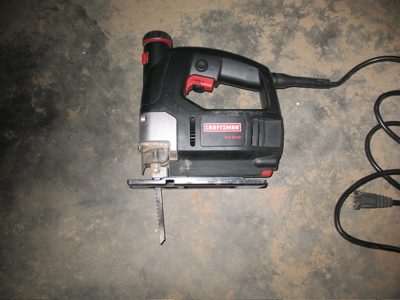
I don’t know about you, but I never would have expected this guy to be as useful as it is. It’s just a basic jig saw but if you put a hole saw hole slightly in the wrong place or it’s just a bit (or more than just a bit) too small for what needs to go through it, this is the perfect tool for enlarging the hole. It’s also pretty small so it fits (albeit barely) when you’re working on top of a wall, 8″ from the ceiling above you inside joists on a 24″ center.

IMG_1963.jpg
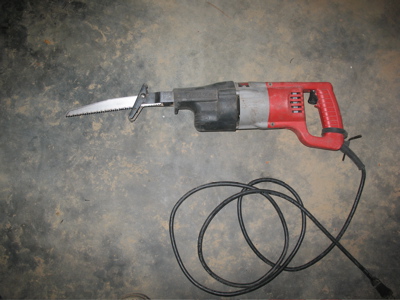
Ah, the sawzall. I’ve been borrowing this from my grandfather for months and it’s super handy to have around. There’s two main things I’ve used the sawzall for while plumbing. Cutting pipe off after it’s glued in place and I realize it’s too long (yes, even with the best of planning, measuring, marking and cutting – it happens) and cutting through nails holding studs in so that I can get the drill or fittings in there. Even though the drill is made to work in stud bays, it still requires close to 12″ of space to work with the hole saw on it and some of my studs bays aren’t that big. I just cut the bottom loose, swing the stud out of the way, drill my hole and then nail the stud back.

IMG_1966.jpg
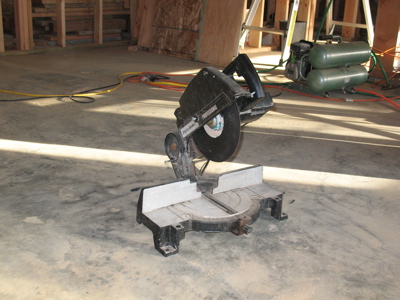
The miter saw with a solid blade. Thanks, Charlie [1]. I’ve seen guys cut pipes with circular saws and sawzalls – I’ve even tried to do it myself. I always have trouble getting a clean cut though. Usually it’s rough or not straight and then I need to work on the pipe before I put it together so that the fitting goes on cleanly. With this though, I can cut through a 3″ pipe in one pass, holding the pipe against the table and I get a nice, clean, straight cut with minimal work. Using the solid blade it’s really melting through the pipe and you don’t get a lot of little hammering blows that you’d get with a standard blade such that might not leave as clean a face.

I didn’t take a picture of my utility knife, but it’s been a big help in the process too, de-burring pipe and making sure it’s ready to fit. Those are the main tools I’ve been using. If I find others as I move on to through the roof work, I’ll post about them as well.

[1] My good friend Charlie gave me his miter saw over a year ago when he moved into a condo that had no place for this level of wood working. It’s been absolutely wonderful to have a second miter saw that I can just keep the solid blade on and use as a dedicated pipe cutter. Thanks very much, Charlie.

Kitchen Wall

Since our house is a SIP house, it’s some extra work to put plugs and switches in the exterior walls. There will be times when it’s unavoidable, but we’re trying to minimize the situation both because it will be easier and we don’t want to pierce the envelop of the walls if we can avoid it.

One area in particular where we have to deal with this is in the kitchen. Kitchen’s require more plugs than any other room and it’s just plain convenient to have lots of plugs there. In order to make our electrical job easier, we’re furring out a 2×4 wall just inside the SIP wall. This will also give us a place to run some water and gas supply lines into the kitchen.

This is what I worked on yesterday. [1]

IMG_1953.jpgThis is the “before” shot. Notice that the wall in the shot (the east wall) is entirely OSB and the flooring in the back of the shot meets the OSB at the top of the wall.

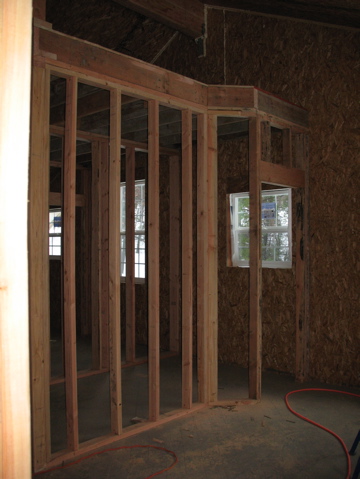
IMG_1964.jpgHere is the “after” shot. It’s not done as I still need to frame around the window and finish building the corner but it’s looking good.

The studs are kind of hard to see, but they’re there. I put them on 24″ centers and we’ll just put a plug on each stud to get our spacing pattern. It’s 2 different sections of bottom plate – they break around the conduit embedded in the slab to feed water and electrical to a possible future island.

If you look at the top, you can see that the flooring no longer (visibly) meets the OSB. We had some leftover appearance grade 4×8 lumber when we built the house (determining lumber quantity must get easier with experience) so we decided to use it to make that wall more interesting after seeing an example in a picture of another house. It’s installed about 1 1/2″ off of the SIP wall which will give us about an inch of reveal past the drywall.

I was working by myself and had some pretty tight clearances so I didn’t want to have to stand the wall after building it on the floor so I built it in place. First I cut and nailed up the 4×8’s to keep them in place. Then I cut and nailed my upper top plate. The upper top plate is nailed to the SIP wall (which has a 6×6 post in it) on the right and to the glu-lam beam on the left. It’s nailed up to each 4×8 joist running perpendicular to the wall and to each decorative 4×8 chunk parallel to the wall. This ties everything together solidly and nothing has any space to move. Originally I’d planned to use right angle brackets to hold the decorative 4×8 chunks in place but I found it almost impossible to get them nailed in (you ever tried holding a nail and swinging a hammer a few inches up inside of a 1 1/2″ wide space?).

Once I had the upper top plate up, I cut the lower top plate and the bottom plates (bottom plates are pressure treated) and marked them for stud locations. I then nailed the lower top place up and just placed the bottom plate where it’s supposed to go. Once I had that to work from I began measuring and cutting studs to go between them. I found there to be about a 3/16″ variance in stud length, probably due to some unevenness in the concrete finishing around the embedded conduit.

After I had about 9 studs cut (enough to get even pressure from top plate onto bottom plate) I glued the bottom plates down with subfloor glue and began nailing the studs in place. After the studs were nailed up, I then nailed right angle brackets onto the studs and then into the SIP wall to help hold the wall in place. Probably this was overkill, but it makes me feel better and I’m sure that the inspector will appreciate it.

This weekend, I plan to finish the wall in addition to more work on waste line plumbing and starting on supply line plumbing.

[1] I know it was a workday – I went out to the property in the morning to meet with someone about some plumbing questions and to borrow PEX tools. It was an absolutely beautiful day and I decided to call my boss and see if I could take an unplanned day off to work on the house. He was very accommodating.

DWV Plumbing

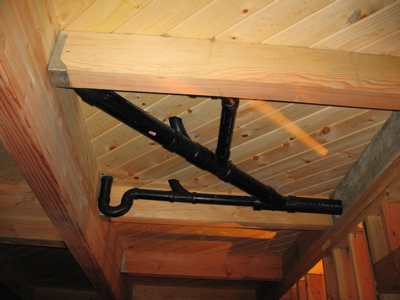
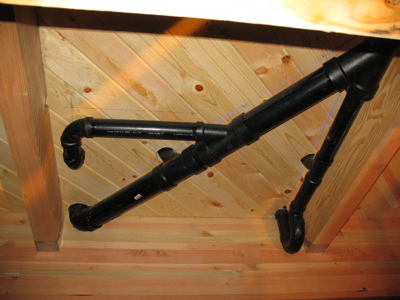
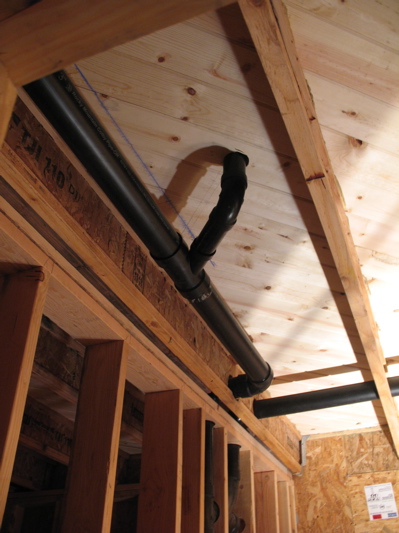
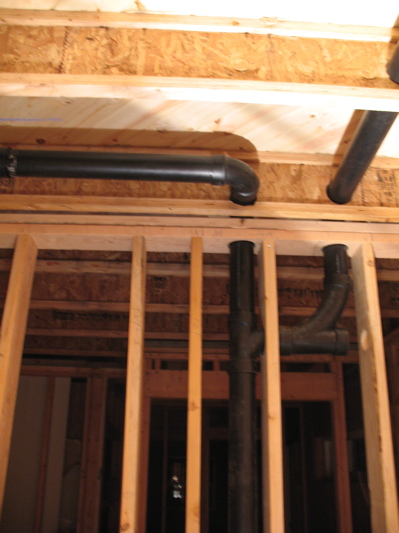
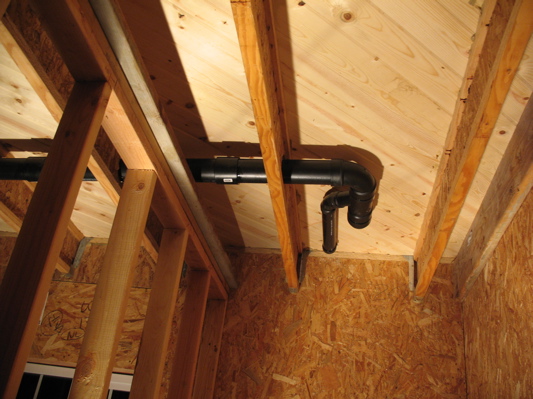
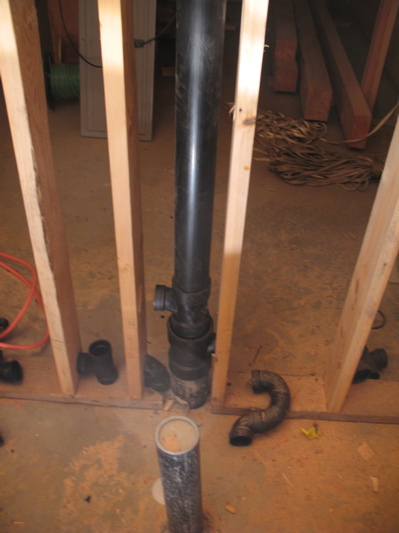
We’re well on our way on the next phase of house building – Drain, Waste, Vent plumbing. The last month or so, I’ve been doing a lot of thinking and planning and the last couple of weeks have been busy executing, modifying and adapting the plan.I’m happy to say that I’ve now finished all 3″ waste lines. This means that the main waste stack is finished, toilet lines are in and all underfloor plumbing for the second story meets up with the main waste stack. I started out with about 5 feet of 3″ ABS pipe left over from slab plumbing and bought another 20 foot length when I started interior work. I now have only a 3 inch and a 2 3/4 inch piece of 3″ pipe left. Unfortunately, I also have a handful of 3″ fittings left over from various plan modifications but I figure that that’s just the way things are.I’m doing all my plumbing in 2″ and 3″ lines so that we don’t have any issues with clogs. We’ve had issues with previous places and I’m doing everything I can to avoid it here – one of which is to keep things big.Here’s the current state of things.IMG_1935.jpgThis is what I completed last weekend, but never got around to blogging about. The p-trap in the back left is for the master shower, the combo along that same line to the right is the vent for that line. The pipe that disappears into the left front corner behind the beam is for the master toilet. The combo in that line is its vent. The wye fitting which sends a pipe off at 45° from the toilet line is to bring in the sink drain from the master sink.IMG_1938.jpgThe same pipes, but from a different angle. Now you can see the line for the master toilet (back left) and the sink drain (just in front of it). We’ll have to soffit this space to hide the plumbing. It’s unfortunate to hide the beams and floor but we’ll gain a raceway for electrical lines. I knew from early on that we’d have to soffit here and I considered if it was worth using TJI’s 2 ft on center rather than the 4×8 joists on a 4 ft center. Given how the plumbing worked out, I’m glad I stayed with the 4×8’s because it gave me a much bigger box to work within and I didn’t need to worry about cutting through joists in this space. If you look closely, you can see my chalk and pencil lines on the underside of the floor. These helped me keep my pipes lined up and at the correct angles.IMG_1948.jpgThe single 3″ pipe that leaves the bay in the previous photo goes through some blocking that keeps our joists from rolling and enters a bay over the downstairs bathroom. The wye in the middle of the picture is where we pick up the drain from the sinks in the kid’s bathroom. We make a 90° turn and enter the main waste stack towards the back of the picture. The other horizontal 3″ pipe in the picture runs out to the right to the toilet in the kid’s bathroom. The master bathroom waste line joins the main stack with a 3″ san-tee with a 3″-2″ bushing so I can continue the vent straight up.IMG_1947.jpgHere’s another shot of that juncture where it’s more clear what’s going on. The master bath waste line is coming in from the left. I’ve got a 3″ san-tee going into a 3″ combo which runs up to a 90° elbow to send the waste line to the toilet in the kid’s bathroom. The other side of the 3″ combo has a 3″-2″ bushing in it and I’ll pick up the drain from the kid’s bath there.IMG_1946.jpgThis is the kid’s toilet connection. I’m using a 332 wye with a 45° fitting to run the vent back and behind the toilet. I built a 6″ plumbing wall there that we will put the vent in before running it out the roof.IMG_1950.jpgHere’s the base of the main waste stack. There’s a 4″ pipe coming out of the slab. I’ve got a 442 san-tee going right for the washer drain. Inside that is a 4″-3″ bushing so that I can switch to 3″ pipe for my main stack. Then I’ve got a 332 san-tee going left for the bathroom and laundry sinks. I may have to run those drains as 1 1/2″ instead of 2″ so that I end up with my drains at the right elevation. I’ll measure fitting sizes and see what fits. In the foreground is our drain line for the downstairs toilet (still sticking up where we had it when we poured concrete) and the little 90° elbow between the 4″ pipe and the stud on the left is the vent for the toilet. Originally, I was going to run that vent straight up in the same stud bay as the wast stack, but there wouldn’t have been any room to get it past the 332 san-tee for the bathroom and laundry sinks. Moving it over to run up this other bay gives me the space I need to let the pipes pass each other.I still need to put together the washer drain line and the downstairs sink lines, the downstairs shower drain and vent which I didn’t take pictures of, plus a bunch of vent stuff upstairs and the kid’s bath. All-in-all it’s going well. It’s definitely more difficult than I imagined it would be, but I feel like I have the tools now to really do the work. Some of those tools are pretty much what you’d expect but I was surprised at the need for others. I’ll write a follow up post talking about tools.

Moving a Wall

We’ve been spending a bit of time walking around the house, looking at the bare, framed walls and imagining how out stuff will fit into it. Thinking about how we’ll be using the space. Considering if it’s all “right”.

We have come to the realization that the master isn’t quite right for our bed. Amber and I bought a really nice (for us) oak, platform-style bed with attached nightstands and built in storage where the header usually is back when we moved into our first house in Felton (before Emma was born). The smallest square that will box the bed is about 8′ on a side. Our master bedroom is about 10′ deep (from the exterior wall to the bathroom wall).

This leaves us only about 2′ to walk around the bed and we just didn’t feel like it would be enough room.

After thinking about it individually, we each came to the decision that it really made sense to move the wall and make more space – and it’ll never be easier to move the wall than it is right now. It was a bit of a pleasant surprise for each of us to raise what we expected to be somewhat of a discussion point only to find out that we shared the view.

My dad and I started moving the wall about 1.5 weeks ago and it’s almost totally done now.

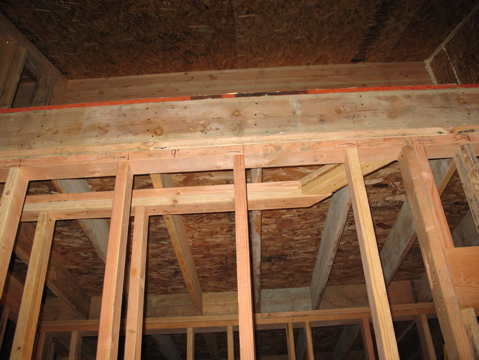
IMG_1752.jpgThis is the best “before” shot I can find. It shows the wall between the master and the master bath.

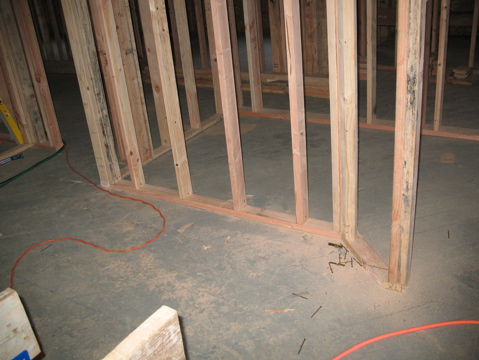
IMG_1836.jpgThe “close” wall is the original one and the far one is the new one. We kept the door where it was and just jogged the wall back 1′ on a 45° angle to make the math and cuts easier.

IMG_1840.jpgLooking up at the top plates. Since we have storage space on top of the bathroom, we’ll have to cut joists and the OSB flooring to match our new wall path.

IMG_1865.jpgHere is the almost finished wall. You can see that the new one is built, rim joist is moved, OSB is fixed and the old wall has been ripped down. In this shot the corner near the door isn’t totally finished, but I’ve finished it since I took the picture.

IMG_1866.jpgAnother perspective – looking down at it.

All in all, it wasn’t a very difficult task. Pretty much just straightforward carpentry. We had to think a bit to make sure we cut things right and we removed OSB in such a way that we could trim the joists, cut the OSB down and re-attach it.

We drew an outline of the bed on the floor using a lumber crayon while we were trying to decide if we had enough space and walking around the “bed” is now much more comfortable. I think that we made a good decision and will be very happy with the results.