Paint decision making

Here’s a couple pictures of our paint selection process.  We ended up going with the one on the corner of the house – the lighter one, not the one on the top painted board.  We’ll have a cream-ish trim color and a red-ish accent color and door.  They should start painting next week!

Rough Electrical at 99%

One more receptacle box. A bit of wire cleanup. Rough electrical will be done! (assuming I don’t find anything else while cleaning up and reviewing it all).

Need to fix a stud and redo some vent piping to make the stud more vertical. Need to install vents for dryer and water heater.

Phones and Space and More

I’m very close on finishing everything I need for the rough inspection. I’ve got an appointment with a guy next Saturday to talk about drywall and get a bid.

Recently completed:

  • All ceiling fan boxes mounted and wired.
  • Can lights on landing wired.
  • Fixtures in kids bath mounted and wired.
  • Master bedroom and master bath swept and vacuumed.
  • Extra lumber moved outside (thanks, Jonathan)
  • Wood flooring moved down from upstairs storage to kitchen area (thanks, Jonathan)
  • Phone line pulled from phone box outside into house (thanks, Jonathan)
  • Remaining electrical box in away room wired
  • Telecom box in hearthroom nailed and wired

Electrical Eccentricities

Completed in the last week or so:

  • Ceiling fan box in the open area
  • Electrical box for the track lights in the open area.
  • Wall heater in the downstairs bathroom
  • Ceiling fan box in the first bedroom (only the master left!)
  • Scaffolding taken down (no longer needed! (until we install the ceiling fan…))
  • Can lights installed in hall downstairs.
  • Can lights wired in hall downstairs.
  • Switches and light bulbs installed for can lights in hall downstairs.
  • Now can turn on/off lights from the doorway
  • Cut lumber and installed block for ceiling fan in dormer of 3rd bedroom – drywall screws and subfloor glue.
  • Started to cut lumber for block for ceiling fan in dormer of 2nd bedroom.
  • Cut wood and installed supporting member for one of two light fixtures in kid’s bathroom.
  • Started installing box for light for above.
  • Cut holes in exterior walls and ran wiring for outside plugs (3 of them). Caulked holes to keep insects and weather out.
  • Moved receptacle for freezer to be 38″ off floor so that it is visible when the freezer is closed.

We bought a chest freezer a few years ago and it’s been wonderful. When we were designing our house, we created a special space just for the freezer in the utility room. Last weekend, we lost power for a few hours. Up here, it’s entirely possible to lose power for hours to days during the winter storms. During the brief weekend outage, we realized that it’ll be a lot easier to run the freezer off our generator if the plug is accessible. Now, we will be able to unplug the freezer and plug it into an extension cord going out to the generator without having to unload the freezer and move it away from the wall.

Tile pictures!

IMG_2274.jpgThe wall behind the woodstove. Drywalled.

IMG_2281.jpgThe raised squares on the wall are spacers created from 2" square pieces of backerboard. They give us the air gap needed to decrease the distance that the stove must be from the wall by approximately 60%. I cut them with the diamond blade and used regular woodworking glue to hold them in place. I shot each of them with a couple 1 1/2" staples to hold them while the glue dried. The orange bit at the bottom is the anti-fracture membrane.

IMG_2282.jpgThis is a better view of the anti-fracture membrane. It’s not mortared down yet, that’s why it’s rolling up at the edges. This material gets mortared to the floor and you mortar the tiles to it. With this in place, cracks that develop in the slab aren’t transmitted to the tiles.

IMG_2319.jpgBig jump. The tiles are all mortared down and sealer was just applied (that’s why they look so dark).

IMG_2321.jpgA closer look at the tiles. You can see that I had to cut the row of tiles closest to the wall. The little blue bits between tiles are spacers that we leave in and just grout over. We needed to do the floor first, partly because that’s what the stove will sit on, and party because the vertical tiles will hang over the wall and it would have been difficult to install the floor after the fact.

Holes in the Roof

This morning, the roof of our house was an unbroken sheet of shingles. Now it is pierced in three places.

Two plumbing vents went in (a 2 inch and a 3 inch) and I believe that the plumber finished his work. I need to put in a dryer vent and direct vent for the water heater but other than that the plumbing/propane should be done.

I finished wiring the boxes with the 220V futures in the bedrooms today while waiting for the stove installers at various points.

The third hole in the roof is for the wood stove chimney. The stove is in place, but the chimney wasn’t run because they didn’t have enough chimney pieces. Everything’s ready and they’ll come back out in a couple weeks to finish the installation.

A Tale of Two (times 43.5) Tiles

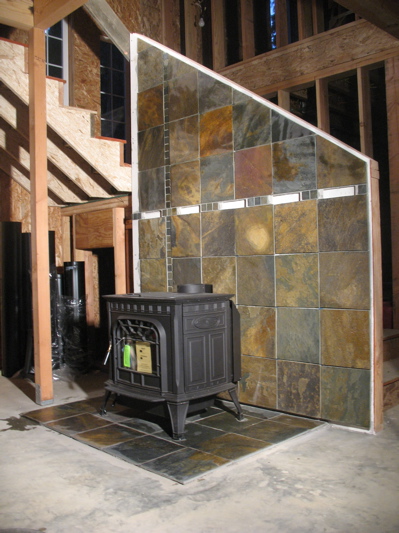
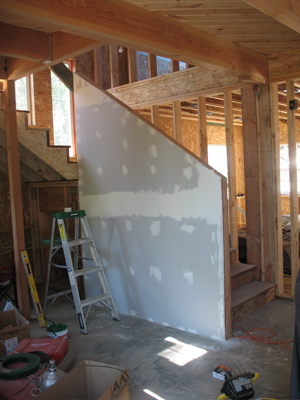
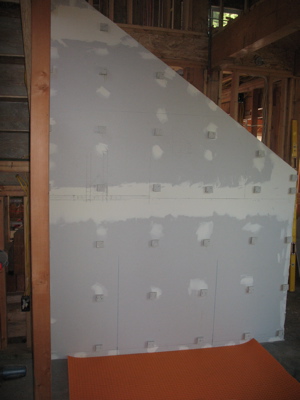
On Saturday I spent most of the day putting up the backer board behind the stove location. The board isn’t right on the dry-wall, it’s spaced off about an inch to create an air cavity. It went well, but took about 5 hours in total. Part of the time was due to the necessity to cut out vent holes and install some extra spacers so that I was supporting the board at the edges.

Once the board was done, I drew an outline of the wall on the floor so that we could lay out the tile. I washed tile and began positioning it. I also spent some time working on the electrical mount for the open area ceiling fan.

On Sunday, we finished laying out the tile and I started mortaring it up. I’ve never installed tile on a vertical before and it’s a bit different from doing it on the floor. The biggest difference is that you need more technique in spreading the mortar before you comb it so that it doesn’t fall down while you go. Then you need to support the initial row of tiles on the bottom so that they don’t slide off the wall.

As the title says, I got 87 tiles installed. That’s right up to the vent line. 48 twelve-inch tiles and 39 two-inchers. I had to cut a couple two inch, and the top row of 6 twelve inch tiles to get it all to fit correctly.

Yesterday, Amber sealed the tile that I’d put up. We still need to grout and we need to put up some additional tile, but we’ve got all the tile that will be behind the stove. Everything else we’ll just work around the stove (which is being installed in about an hour).

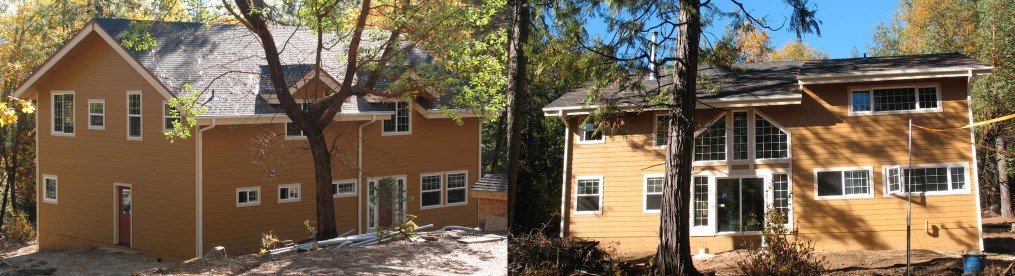
We will post pictures some day. 😉

Tile and Phone

Tuesday night I went down and scrubbed at the grouted tile with cheese cloth to get rid of the grout haze that wasn’t totally cleaned up. I also did some clean up for the plumber who started yesterday and ran a pull string for the phone service which was supposed to be installed yesterday.

Running pull string through 200 ft of conduit by yourself is a bit of a chore. I had the vacuum at the bottom and the string at the top and had to go back up a few times to free snags in the string.

Last night, Amber finished getting the grout haze off while I used the diamond blade to cut the anti-fracture membrane that was sticking out past the tile on one side. I can’t say often enough how great that diamond blade is. The whole space cleaned up well and Amber put sealer on while I went up and replaced the small, poly pull rope with mule tape. The phone guy didn’t have enough time to do the install yesterday but he came by to look at it and asked us to put in something bigger.

The phone service should be setup today or tomorrow.

The plumbing work is progressing well. It’s nice to have that taken off my plate.